

How To Fix Grass In Lightroom Classic
Landscape photography is one of the core genres of photography as an art. The truth is, physically clicking the shutter and making the photo is simply function of the full mural photography experience.
Post-processing your landscape images is what makes them truly come to life. I'm going to testify you how to enhance a photo you've made using some simple editing in Adobe Lightroom Archetype.

Lightroom Editing for Landscape Photos
It'southward a weird illustration but ane I ever love to make… processing your landscape photographs should be like getting a good haircut; the changes should brand the finished production await great but not be overly obvious. When we enhance our landscapes, the edits nosotros make should be harmonious and natural while transforming the image into something that matches your artistic vision. Overly Photoshopped landscape images run rampant in the photography.
These photos are well intentioned only are generally unappealing and gaudy. At that place are much ameliorate methods for editing your landscapes and you're about to larn some of them right at present! Adobe Lightroom Classic CC is one of the well-nigh powerful photograph editing platforms bachelor and this is especially true when yous're working with your landscape images.
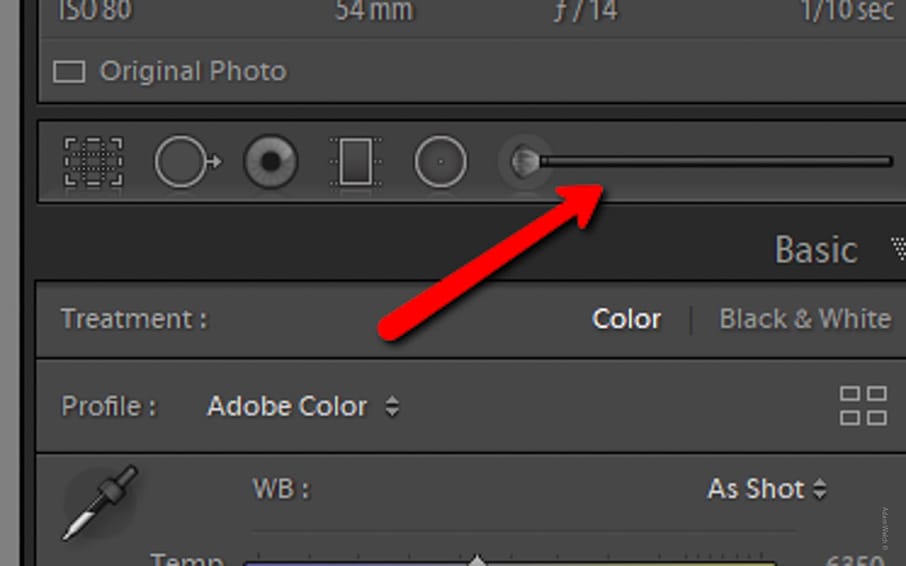
There are a few things to know earlier we get started and information technology concerns how y'all apply edits in Lightroom. There are two primary categories of adjustments: global and local.
Global Adjustments
When we talk about "globally" adjusting an epitome, we mean that our edits, whatever they might be, are applied to the unabridged image as a whole.
If we increase the exposure the entire image becomes brighter. If we add clarity the unabridged image is afflicted. Global adjustments change every aspect of the photo and tin be a good or a bad affair. As you learn more and more about Lightroom y'all will find that using just global editing tin can sometimes exist counterproductive when working with landscape photos because you have to retrieve in terms of overall harmony. Let me prove you what I hateful.
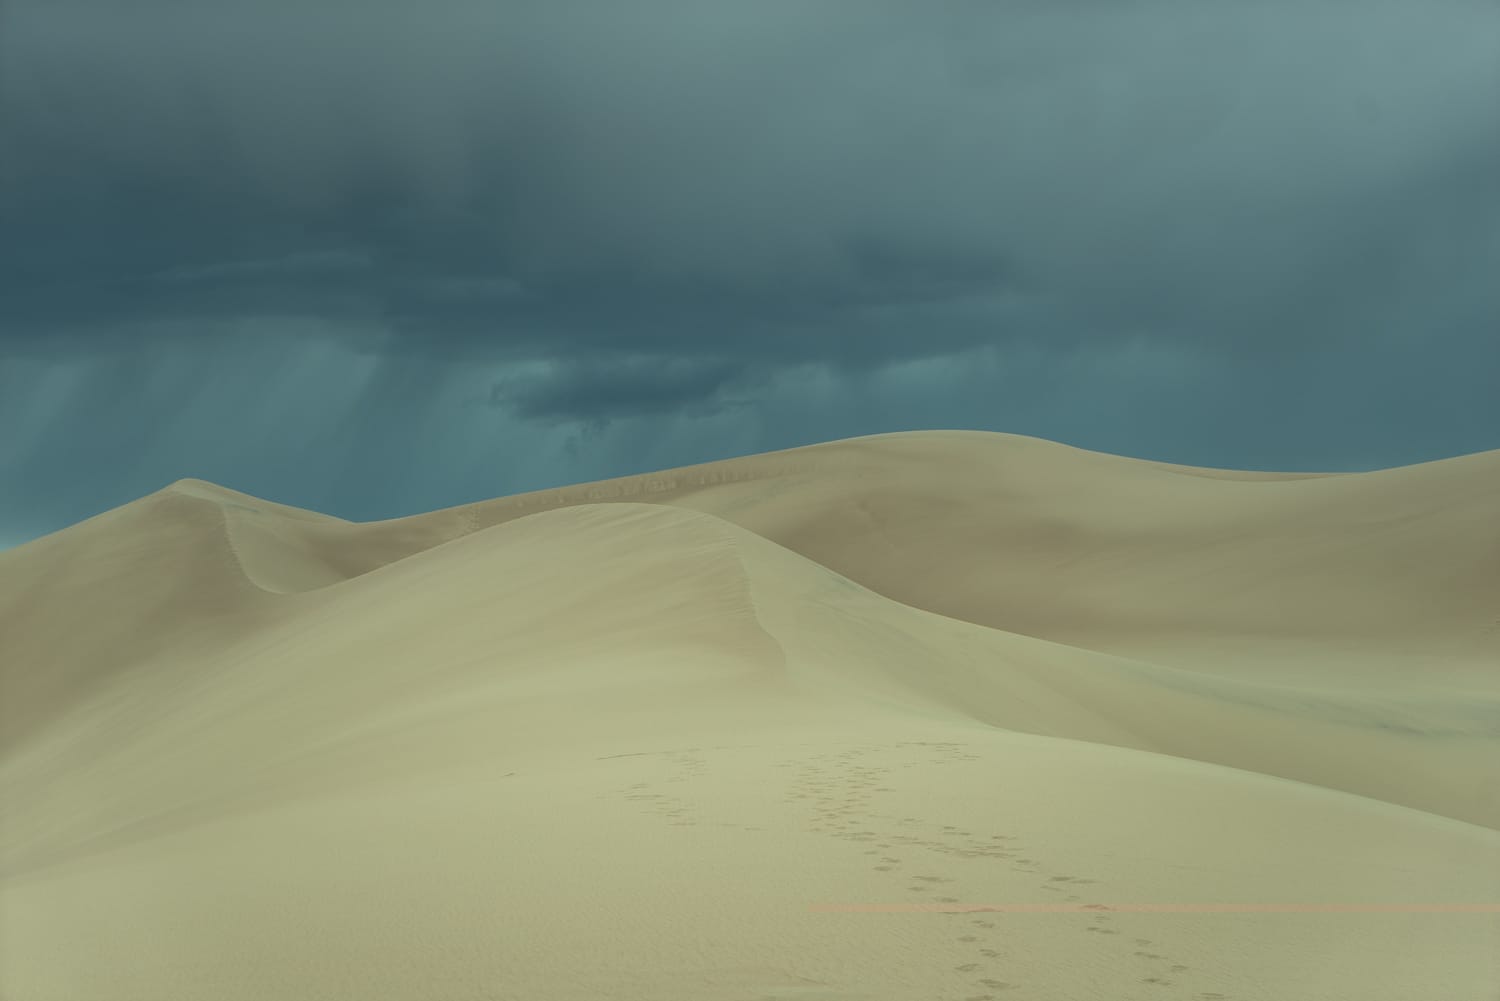
Hither we have a RAW file that is overall extremely flat. I exposed for the sky in order to keep detail in the highlights.
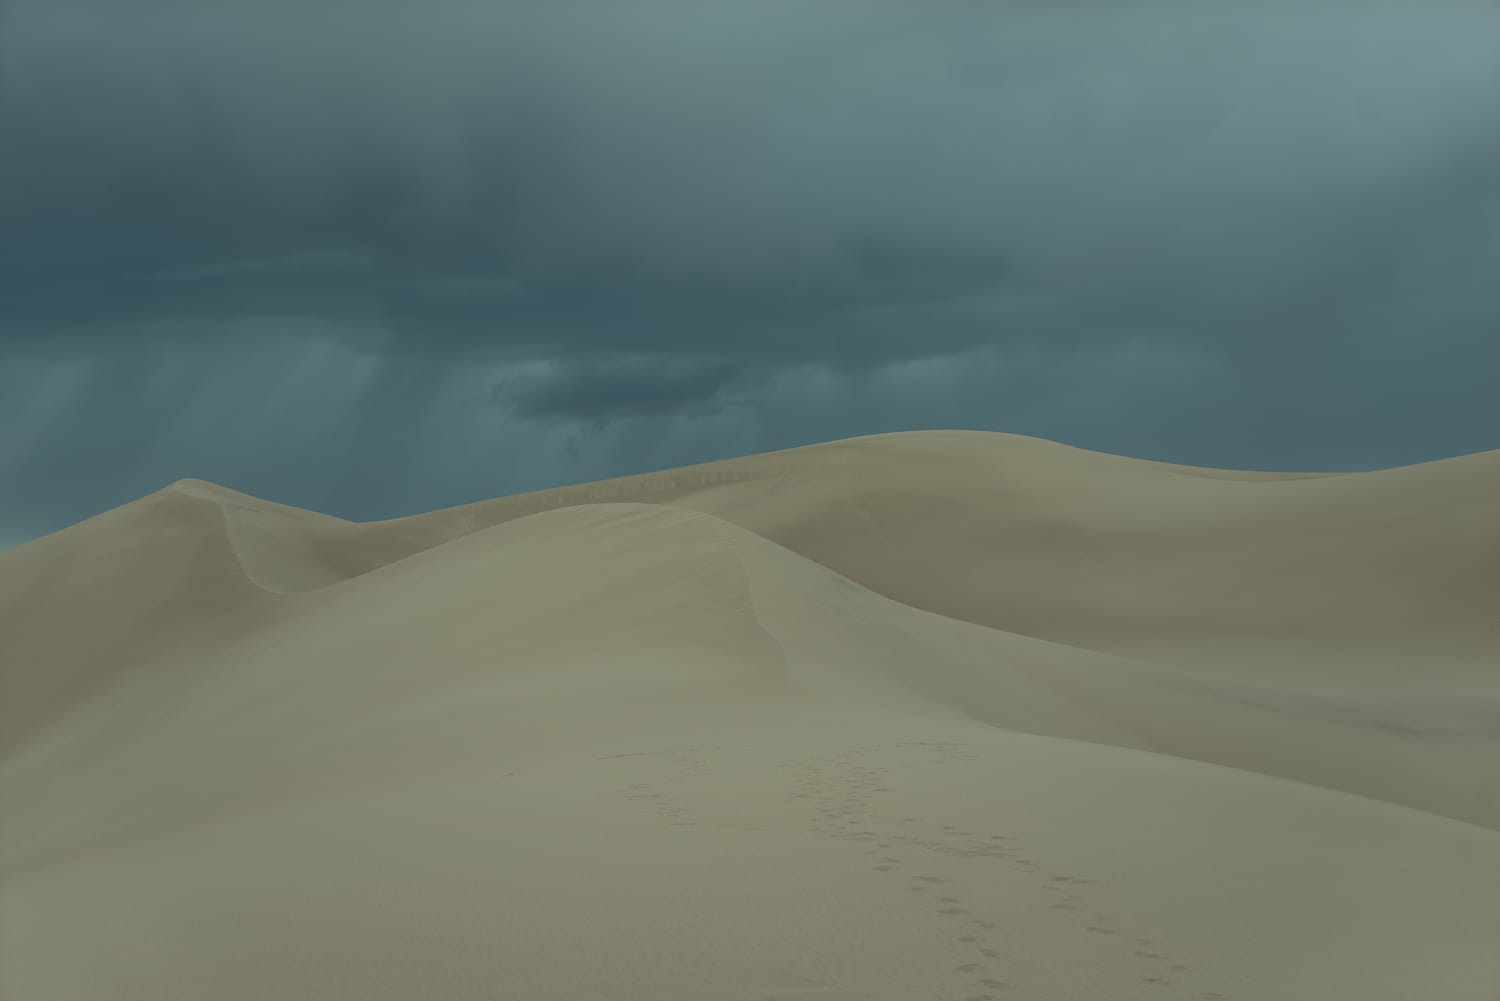
I desire to liven the image up a chip. To do this, I'll increase the contrast and the exposure…
Whoops! Somehow information technology looks fifty-fifty worse at present. The reason for this is the fact that we used what's called a "global aligning" which increased the contrast and brightness of everything in the frame. There are means effectually this trouble and we'll talk most them in simply a second. For now, just keep in mind that while global adjustments can solve one problem in your photo they can potentially create another.
Local Adjustments
If I had to guess, I would say that local adjustments make up 70-80% of all the changes I use during my Lightroom editing. That percentage goes upwards even more when I'm working with a landscape photograph. A "local" aligning is simply a term used to describe any edits you selectively apply to your prototype.
Whereas global adjustments impact the entire photo local edits merely employ themselves to the areas you select within the frame. Local adjustments are hugely helpful when tackling landscape photographs which involve many unruly exposure, color, or texture elements.
The local adjustments in Lightroom include the graduated filter tool, the radial filter tool, and the adjustment brush tool.
Graduated Filter Tool
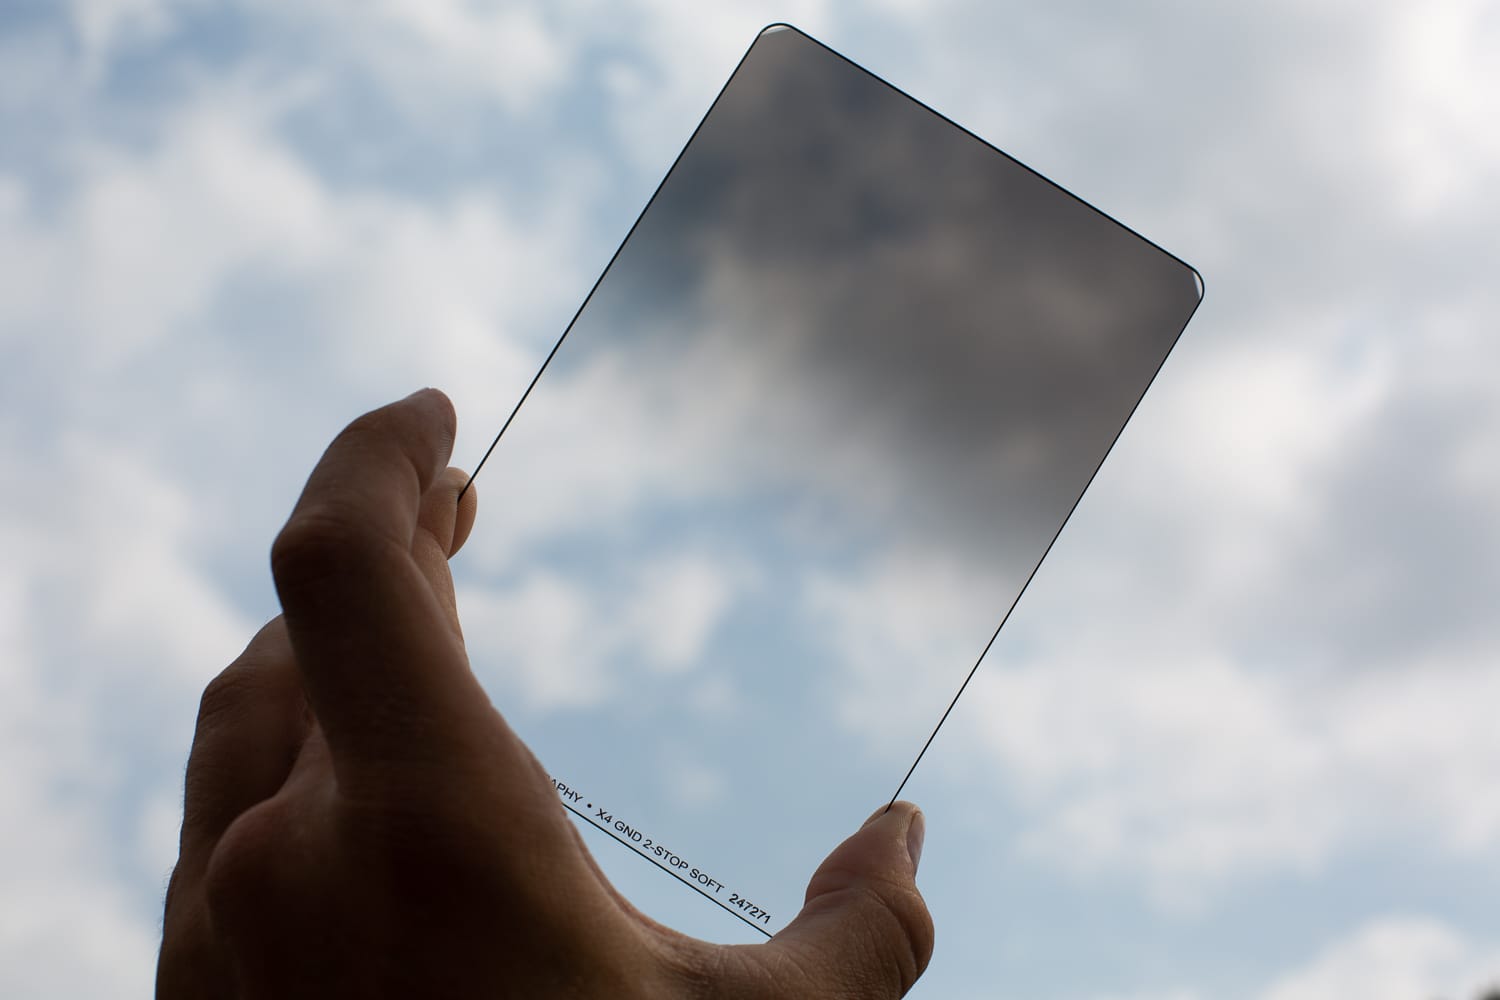
The graduated filter (GF) tool is essentially a digital replication of the physical graduated neutral density filter (GND) used by many landscapists. Real GND's range from very cheap to highly expensive.
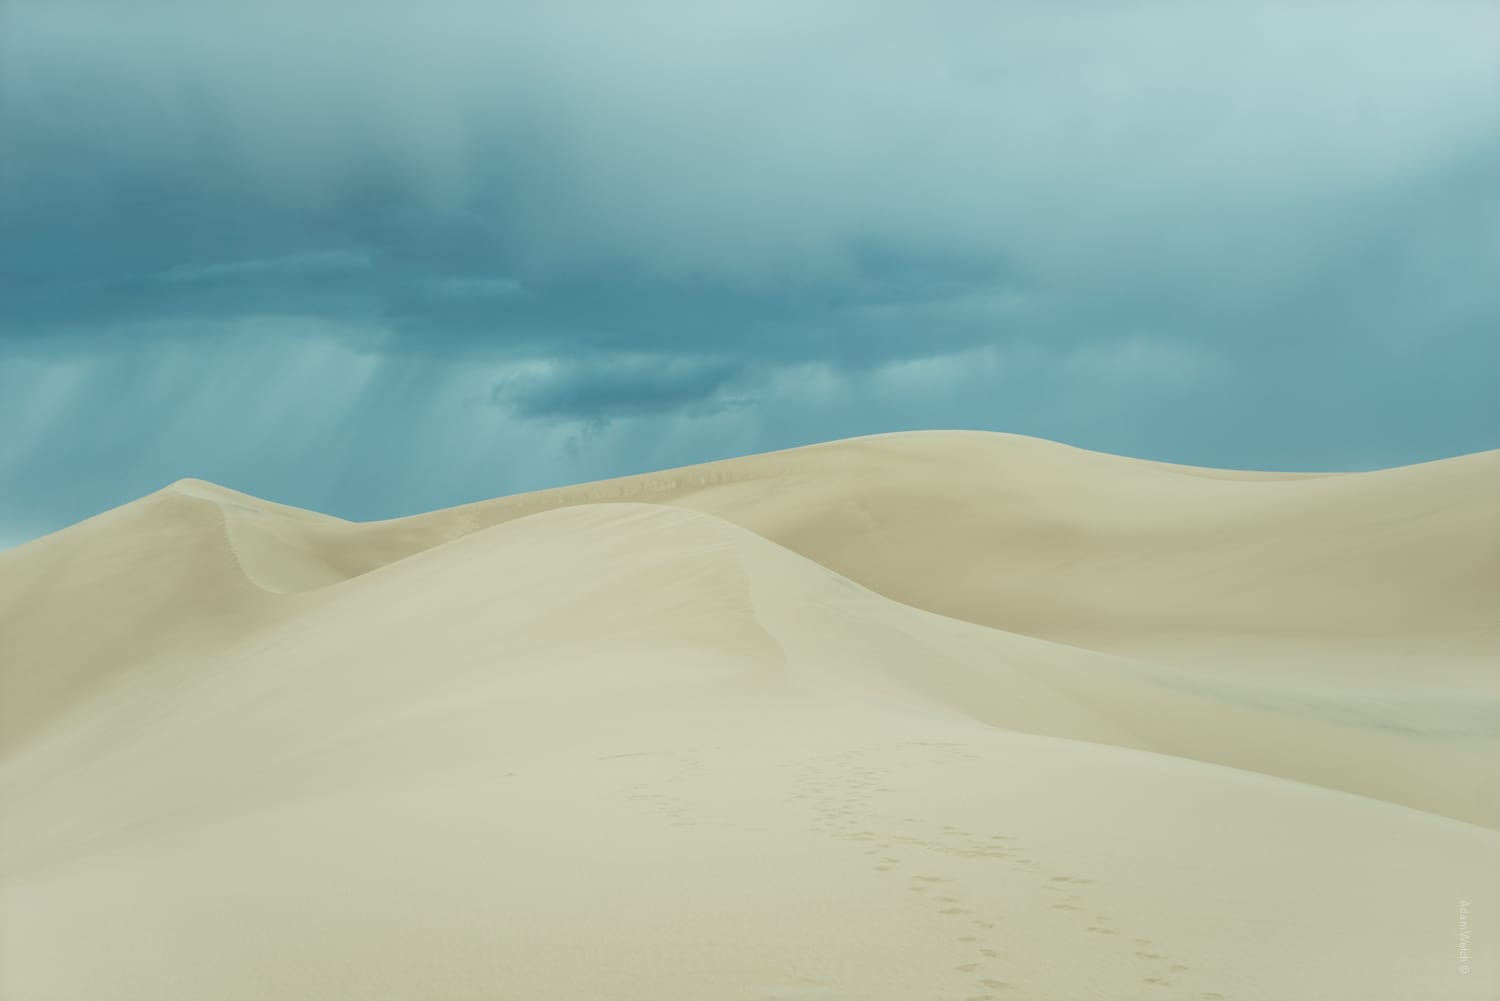
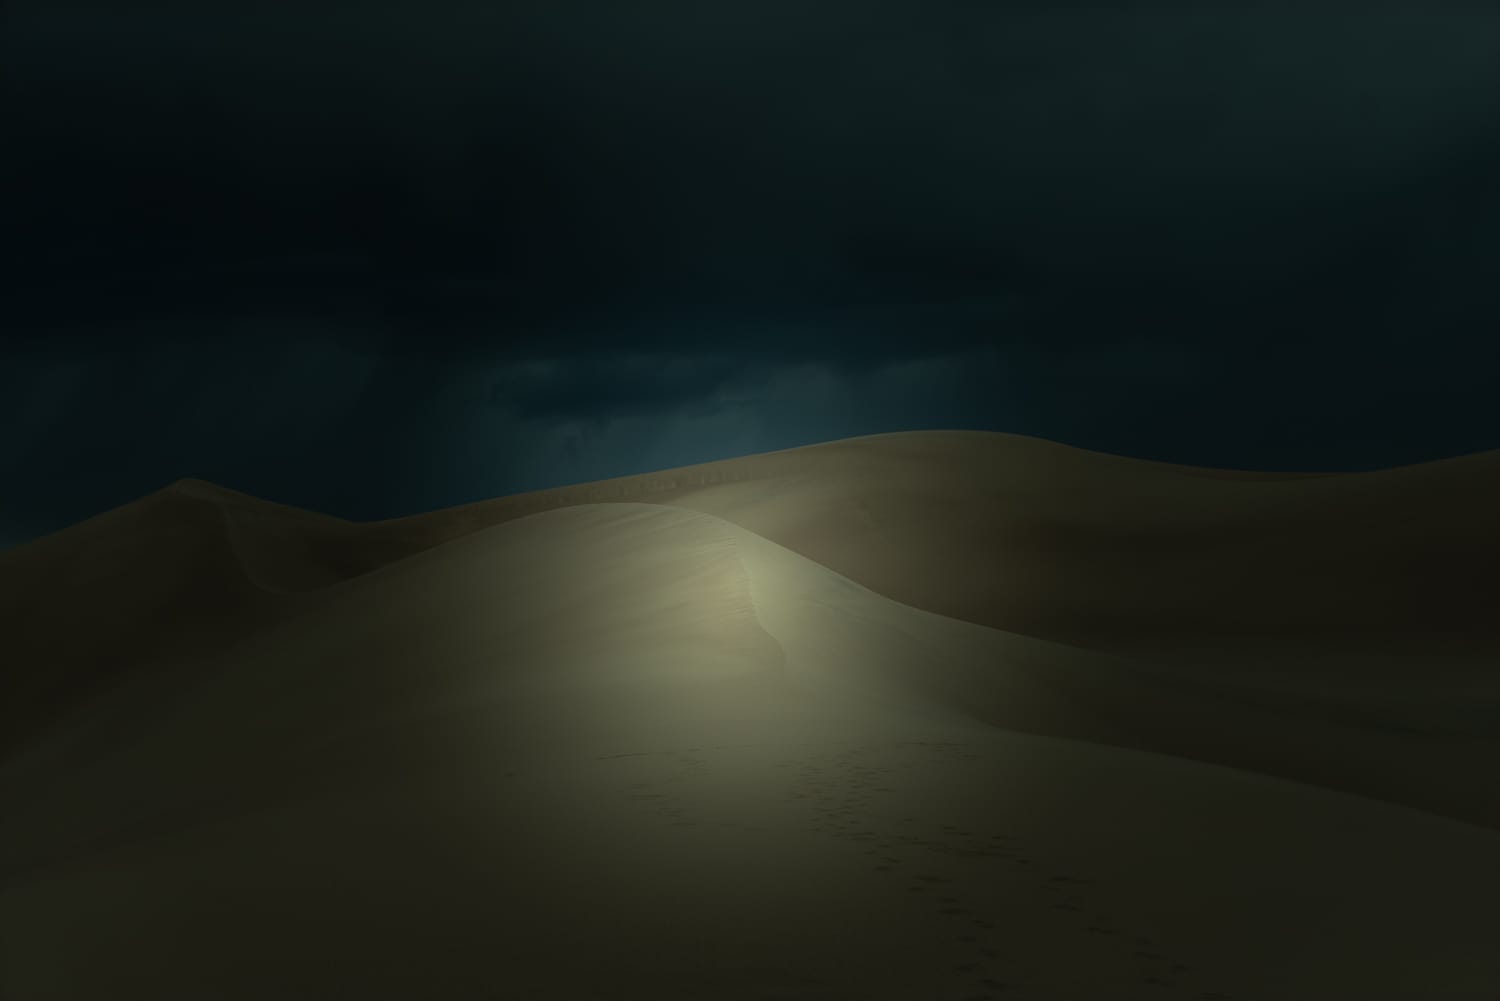
Some digital cameras (like my Sony A7R Mk1) fifty-fifty have apps available which blend two exposures together in-camera to achieve normalized exposure for both heaven and foregrounds. The power of the GF comes from its ability to apply edits with a defined purlieus. Here'south that same photo to which nosotros applied our global adjustment earlier.
This time, we'll use the GF on that foreground and use a local exposure and contrast adjustment.
Blast 💥 The foreground detail pops back into view without destroying those highlights in the sky.
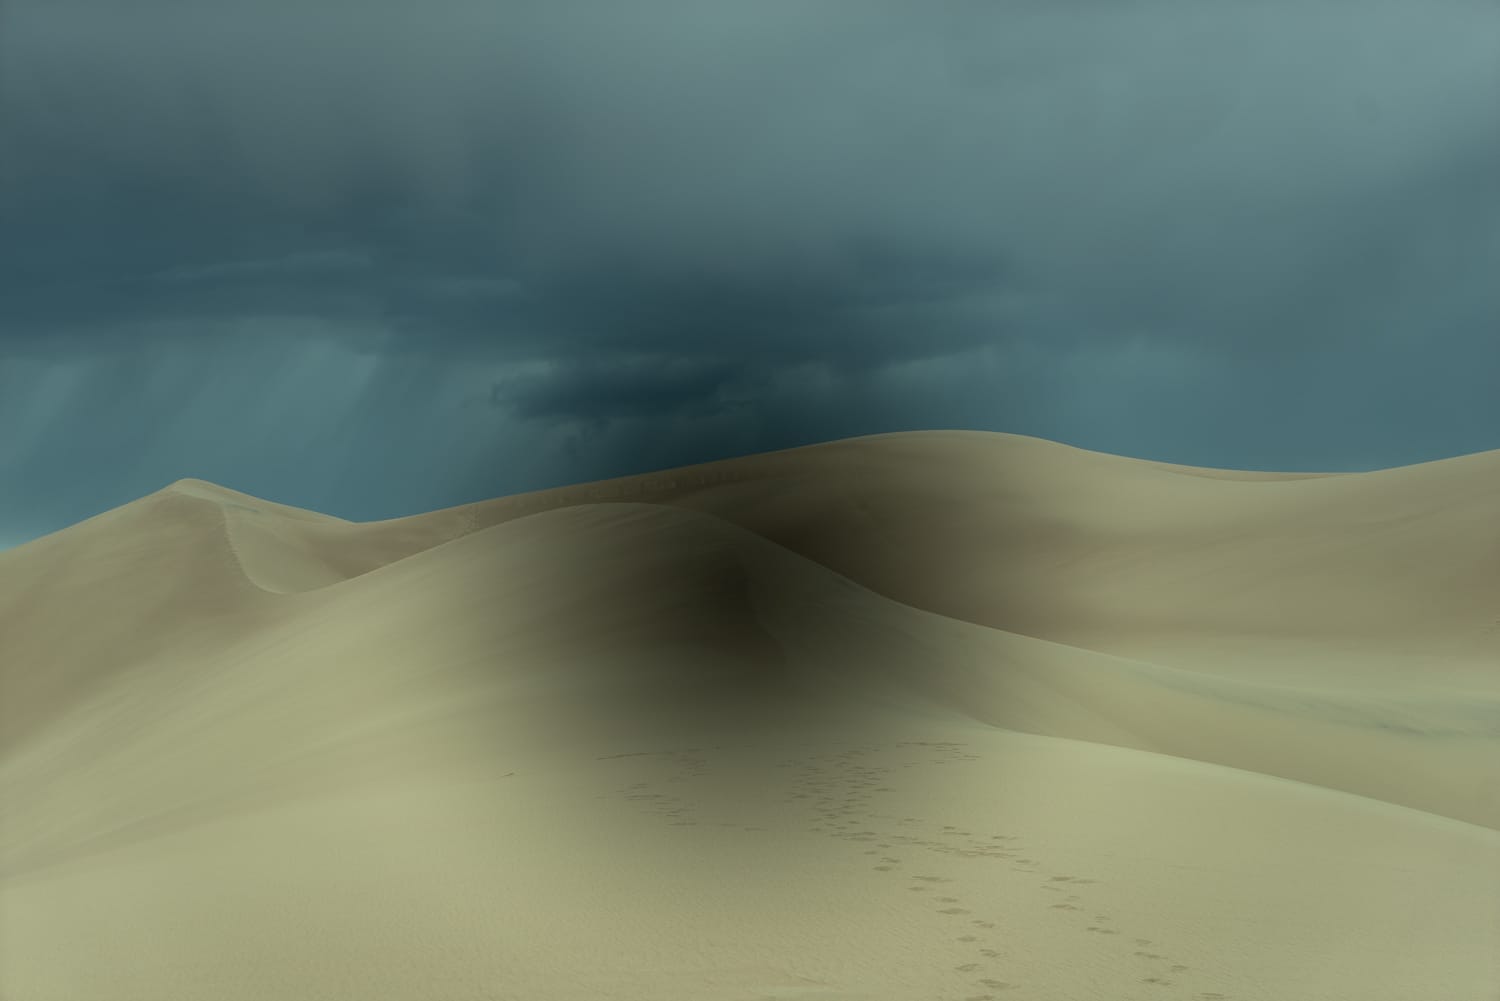
The purlieus and feathering size of the GF tin be either abrupt or more subtle and is enormously useful while applying edits to your sky or foreground without ane disrupting the other. Nosotros'll discuss working with sky and foreground epitome elements in the next section.
Radial Filter Tool
The radial filter (RF) tool takes the ability of the GF and wraps information technology into a circle. With the RF, we can apply edits selectively either inside or outside the boundary of the filter. This helps us brighten or darken sunlight, sharpen or mistiness certain areas of the images, or even add a more precise vignette… and that'southward just to proper noun just a few swell things the RF do for your images.
Permit's accept a quick instance… I've used a RF to apply some extreme exposure reduction outside of the RF's boundary. Notice how the upshot is just observed in the areas outside of the RF.
Nosotros can likewise capsize the filter so that our edits are but practical inside the perimeter of the RF. This gives the consummate contrary consequence.
The versatility of the combinations that can be made with the RF are virtually limitless. It tin work wonders for your landscape photography.
Working with Foreground and Background Elements
At present that we have an understanding of how some of the tools in Lightroom tin can aid your landscape work it's time to go over how to raise a photo in terms of foreground and background. In landscapes, the groundwork will generally consist of some portion of the sky with your foreground beingness composed of various elements like trees, grass, rocks, buildings, even people.
I'chiliad going to take an unedited RAW landscape photograph and evidence yous how I use some basic edits to the foreground and background using the tools nosotros've but learned about.
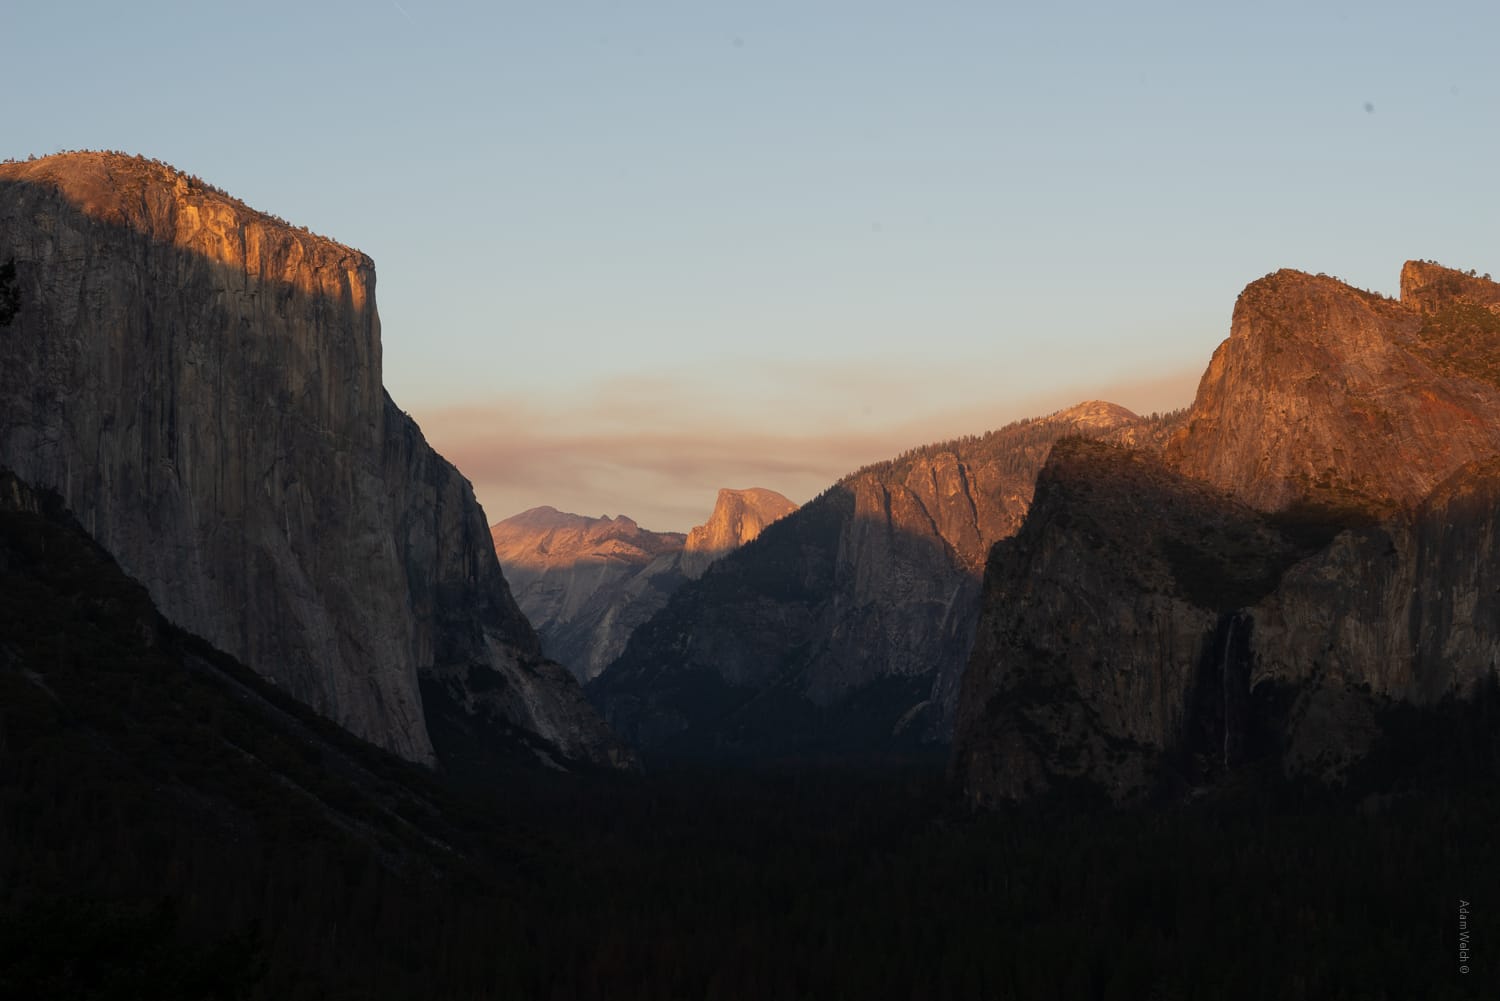
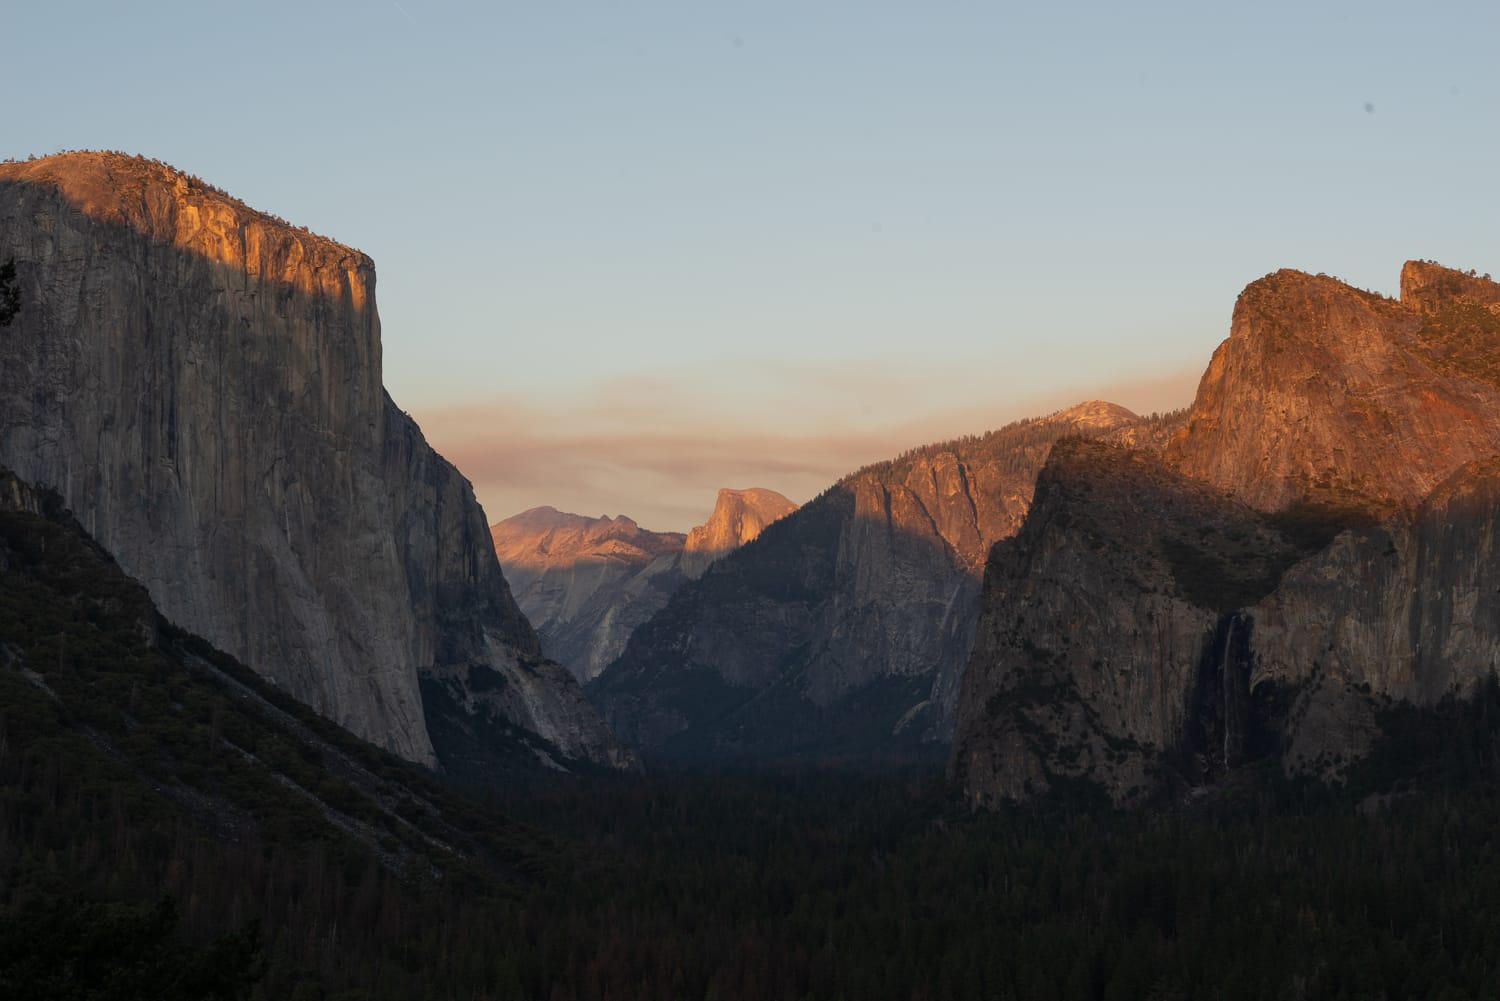
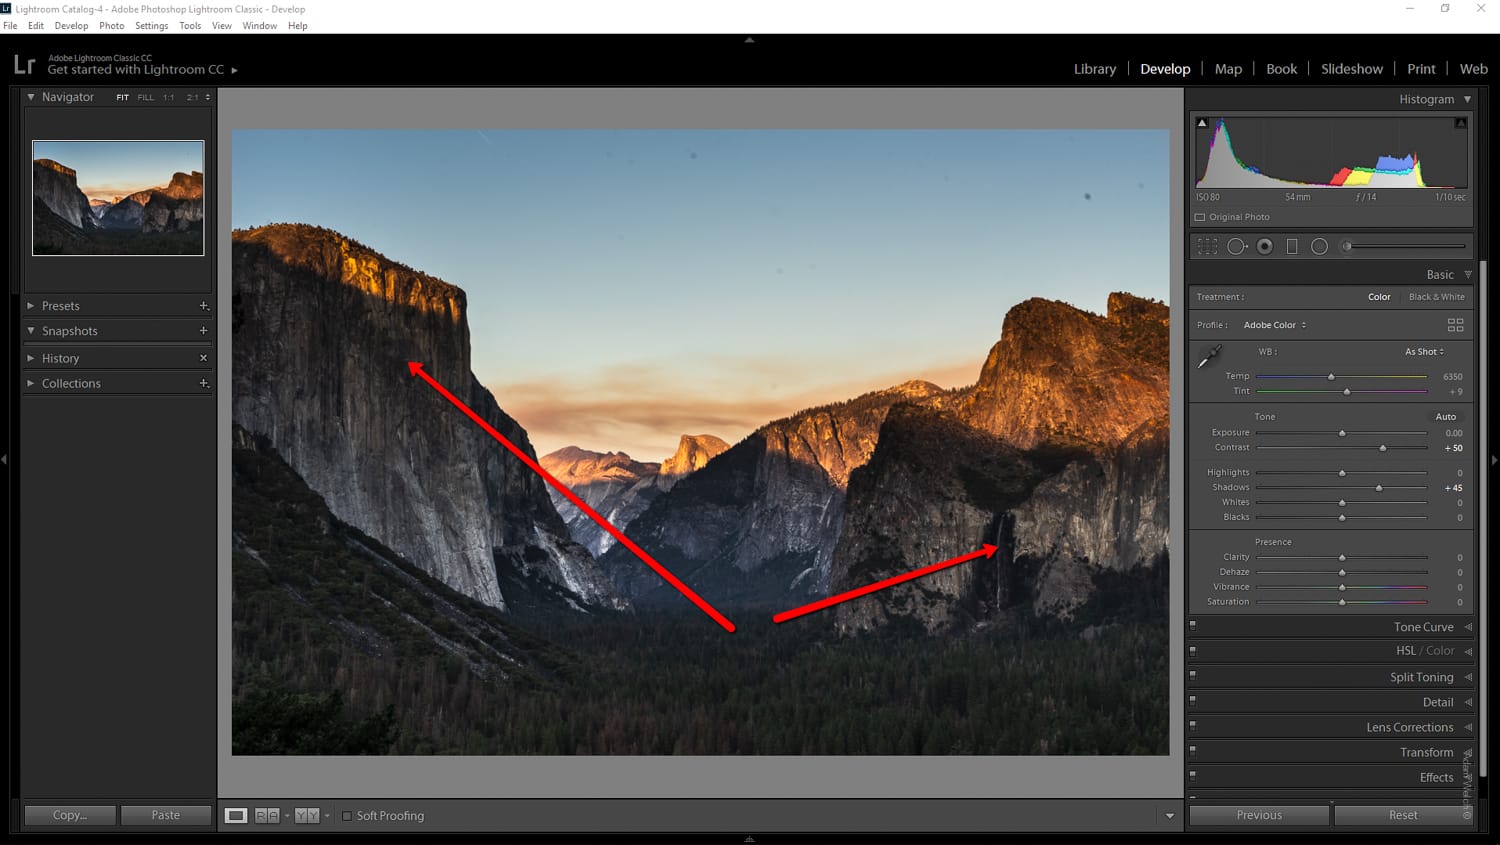
This is our base RAW file that we will use. It'due south a shot looking out over Yosemite Valley at sunset. Lots of foreground with afar background elements which tin brand for a tricky editing feel.
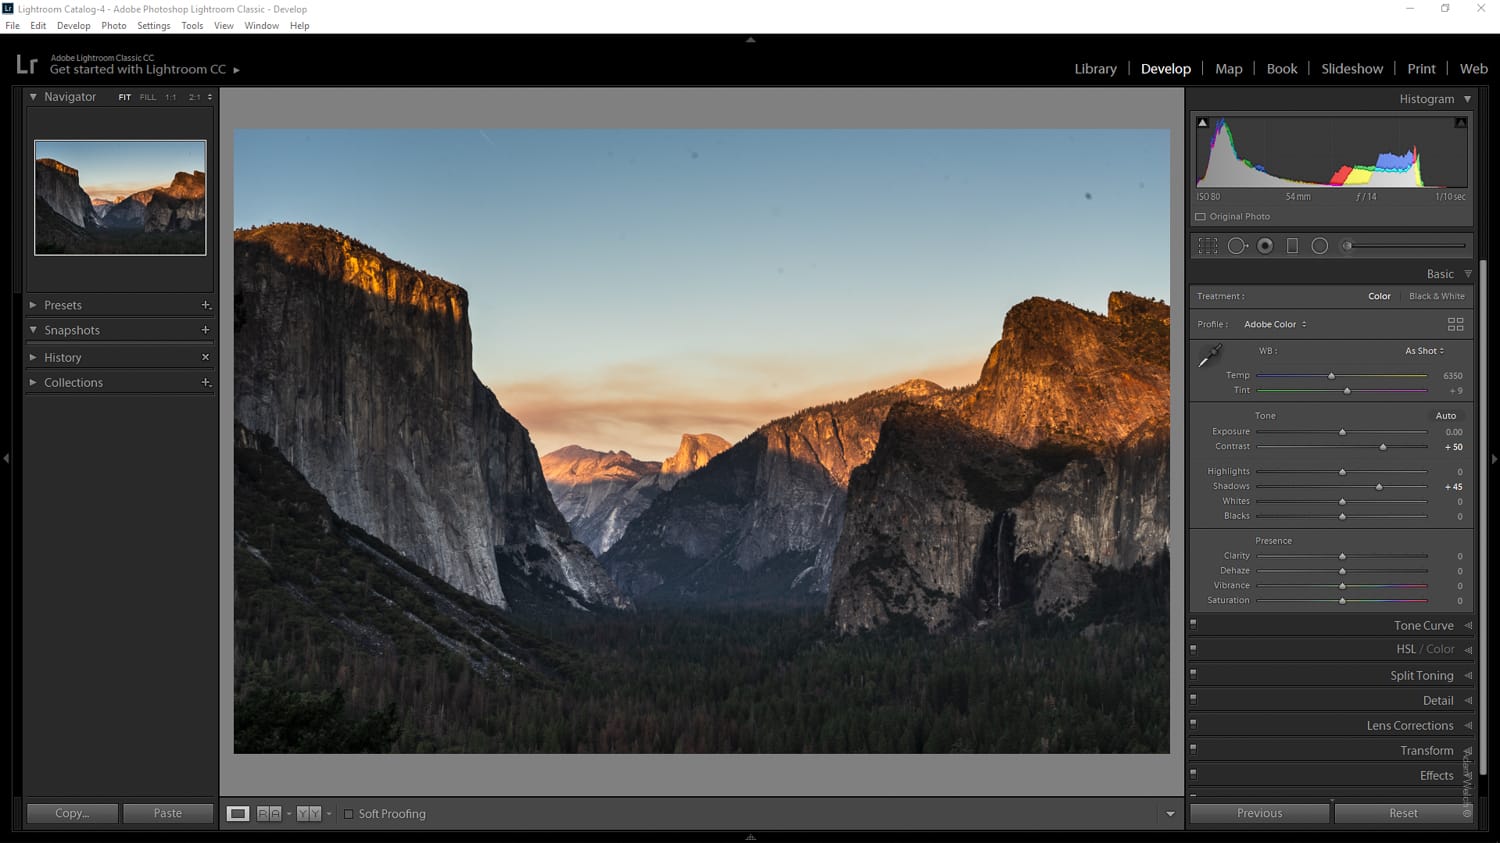
First I desire to open the shadows, so I increment the global shadows by +45.
At that place'south detail at that place merely overall the tone is quite flat. I desire to bring out the item in the valley then I'll employ a GF to do just that. Using the GF and dragging upward from the bottom of the frame, I add together in +55 clarity and +.xl exposure to the foreground.
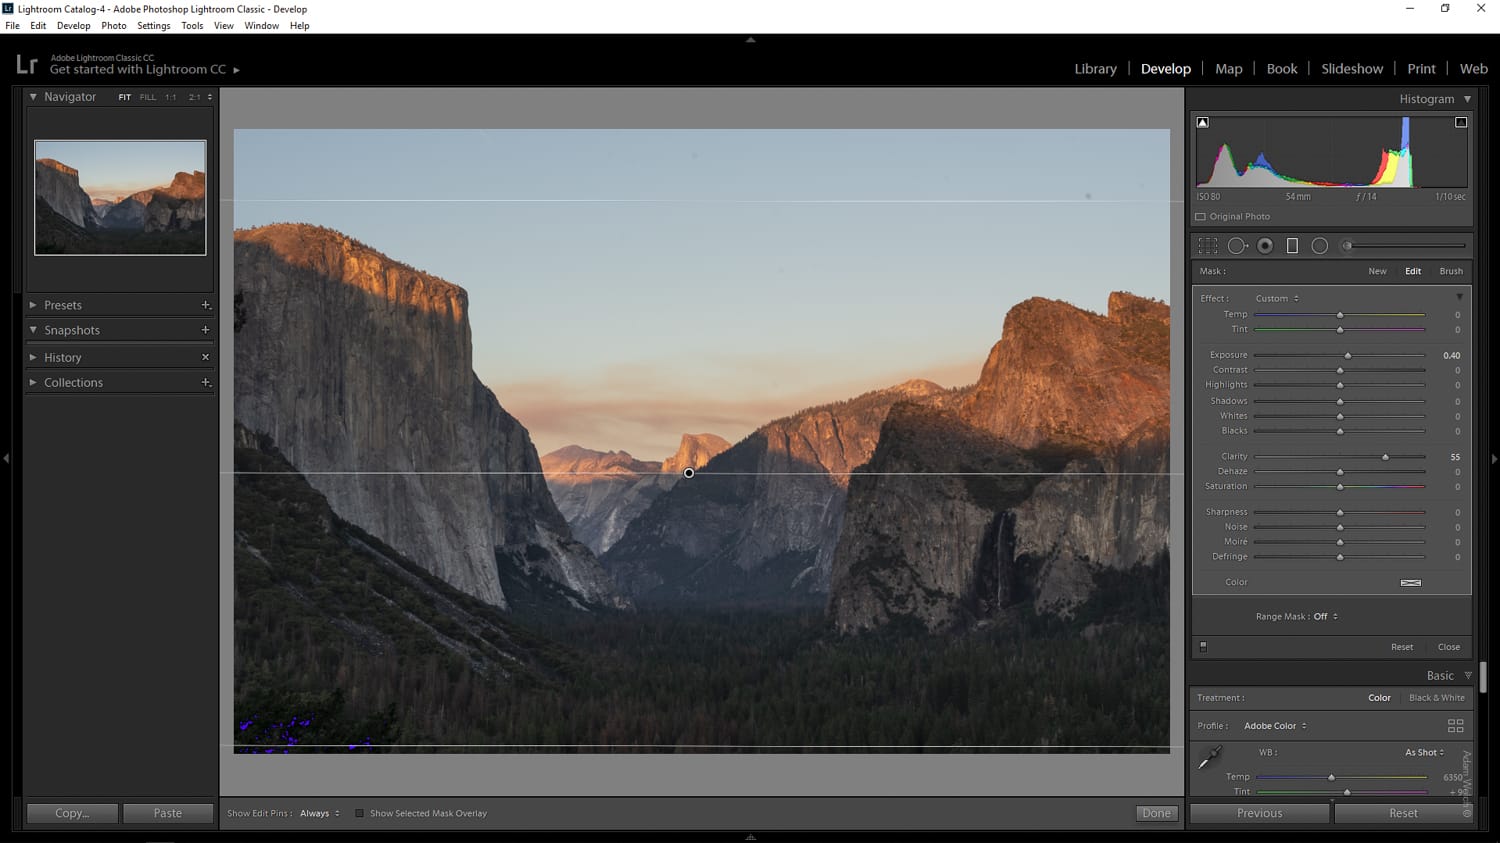
Things are already looking much better!
Next, let's movement on to that heaven and really make this photograph pop!
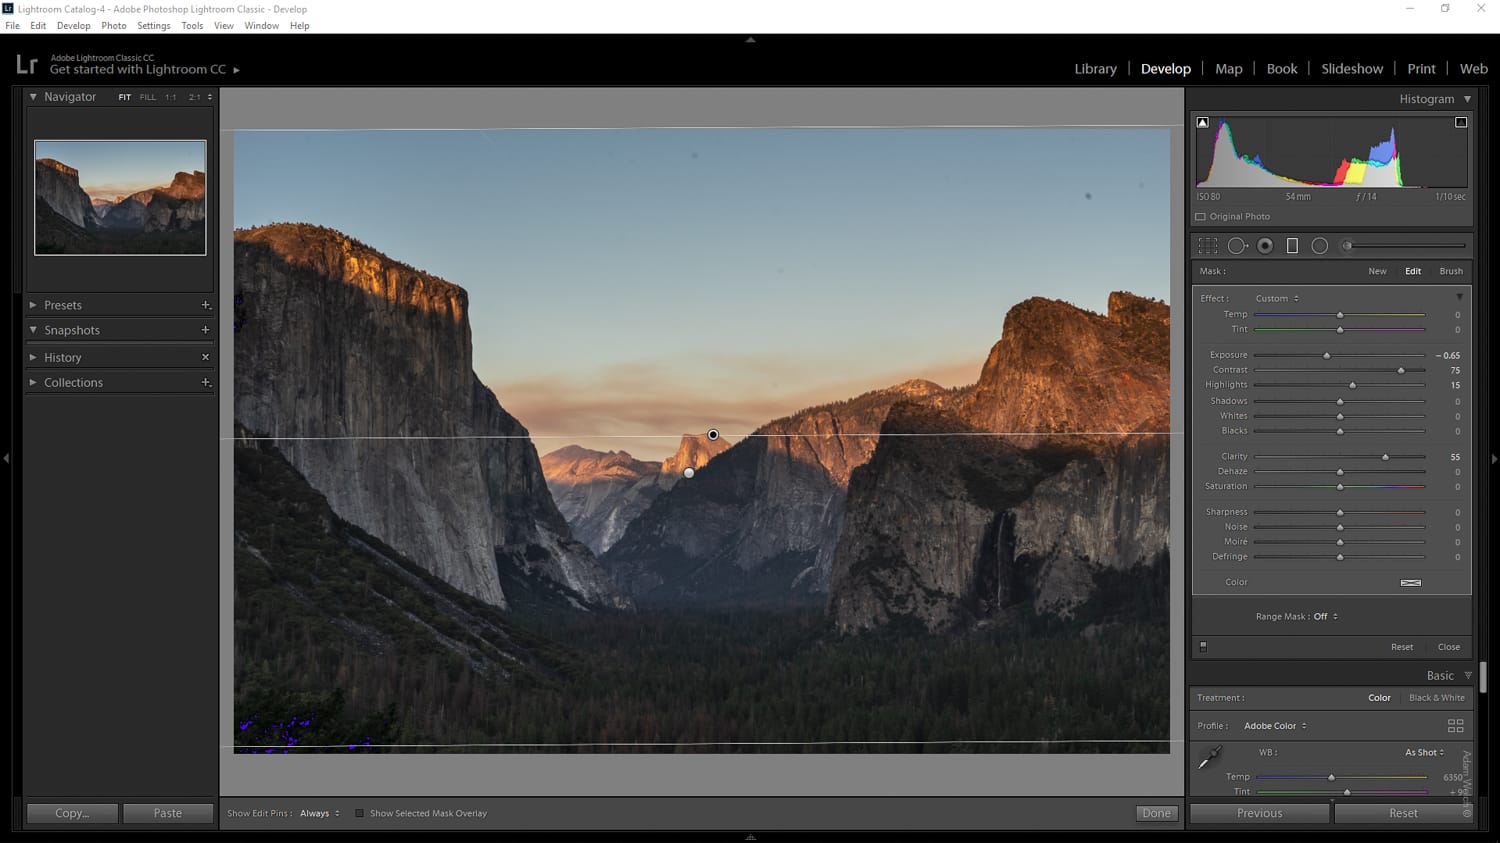
I create a new GF and this time pull from the top down until I have the filter where I want information technology then that the edits stop roughly at the top of One-half Dome (the monolith in the center). I boost the highlights by +fifteen and the clarity past +55. I likewise dim the heaven a flake by decreasing the exposure by -65.
Don't worry about the GF overlapping the elements at the left and right of the frame, it will actually help united states in this instance. To exit the GF filter toolbox, click "Washed".
Now that we've got some progress made with the foreground and background of the image using our GF it's time to work with some global adjustments. The dandy thing nearly using local adjustments alongside global adjustments in Lightroom is that you can e'er get back in and tweak the local adjustments dynamically as you work globally. Let me evidence you what I mean. After I add in some global contrast (+fifty) the overall brightness of the image, and peculiarly the foreground, becomes a trivial too night for my taste.
To brighten things upwards a bit all I need to go back to my foreground GF and increase the exposure to recoup for the increased contrast. Nosotros can admission any local aligning nosotros accept made past first clicking on the respective icon, in our instance the GF filter, then selecting the "pivot" GF filter.
After I bump up the foreground exposure I also reposition the GF slightly to make the effect wait more natural. Here's the result after calculation more exposure.
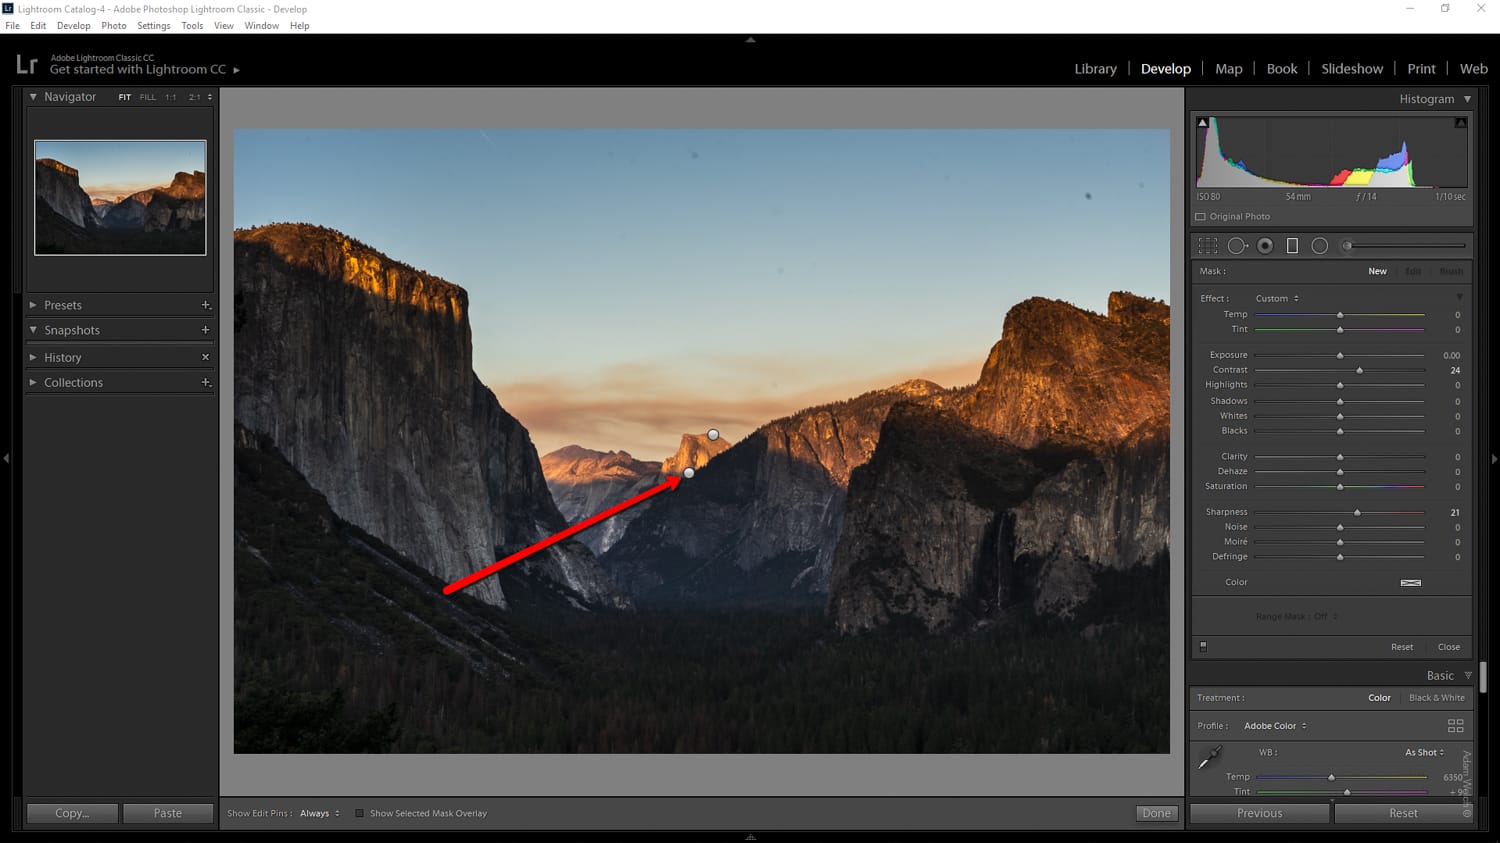
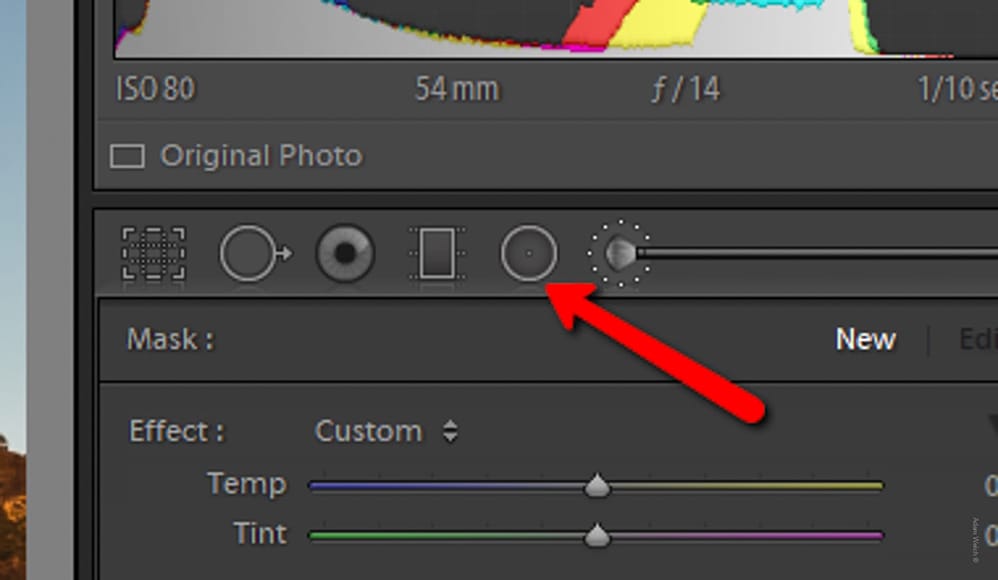
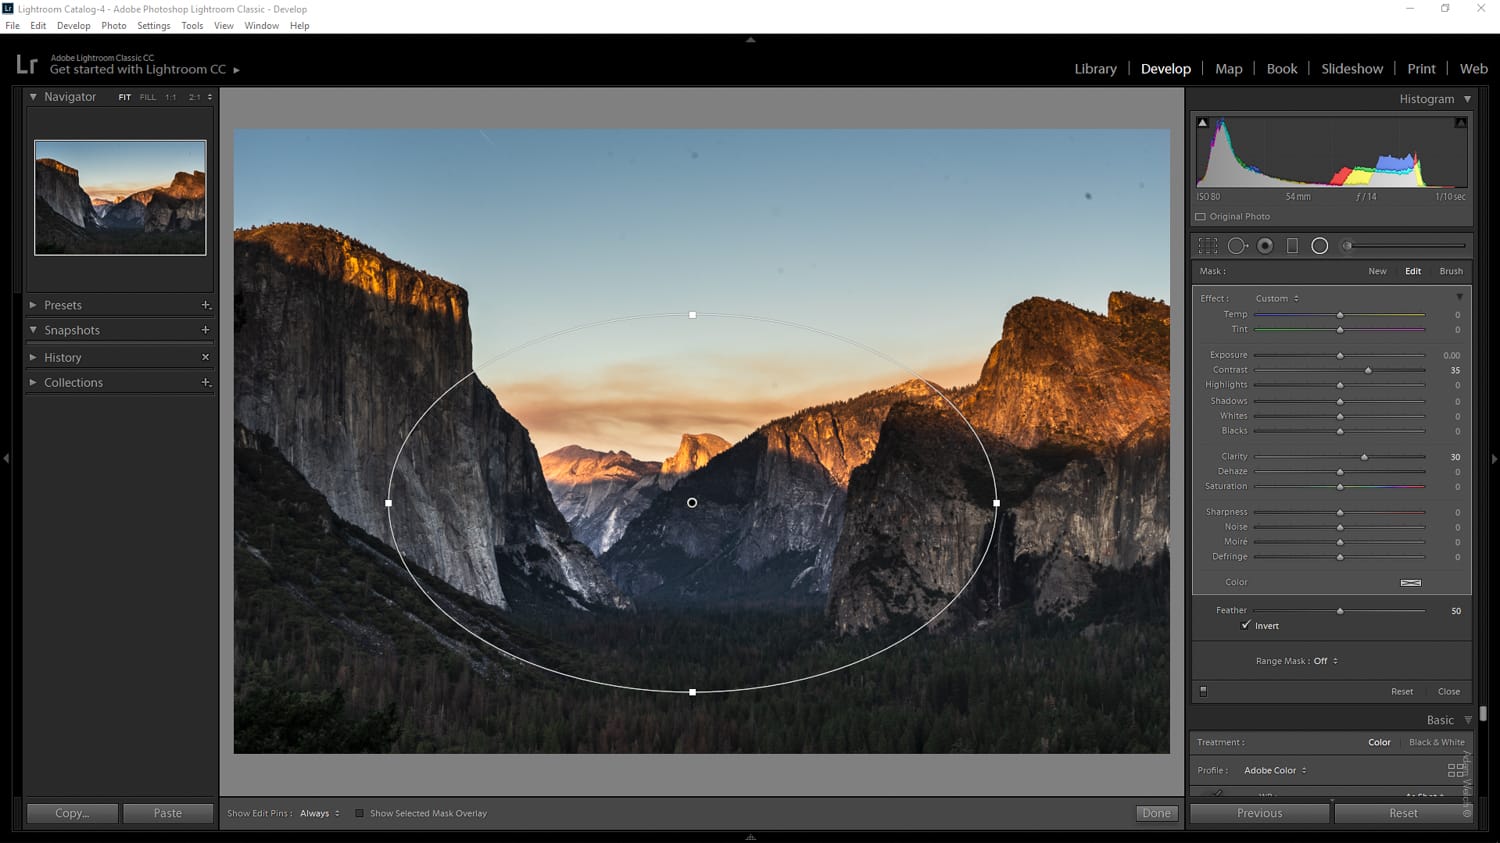
The middle of the image still merely looks a little too flat and so I'm going to use a radial filter(RF) to add in some contrast and clarity to the center of the frame in order to assist depict the viewer into the scene. To do this, I outset click on the RF icon:
Then I apply an inverted (edits inside) RF filter (Contrast +30, Clarity +35) to the area in the centre of the image where I want the edit to be applied.
Click "Washed" to exit the RF filter toolbox.
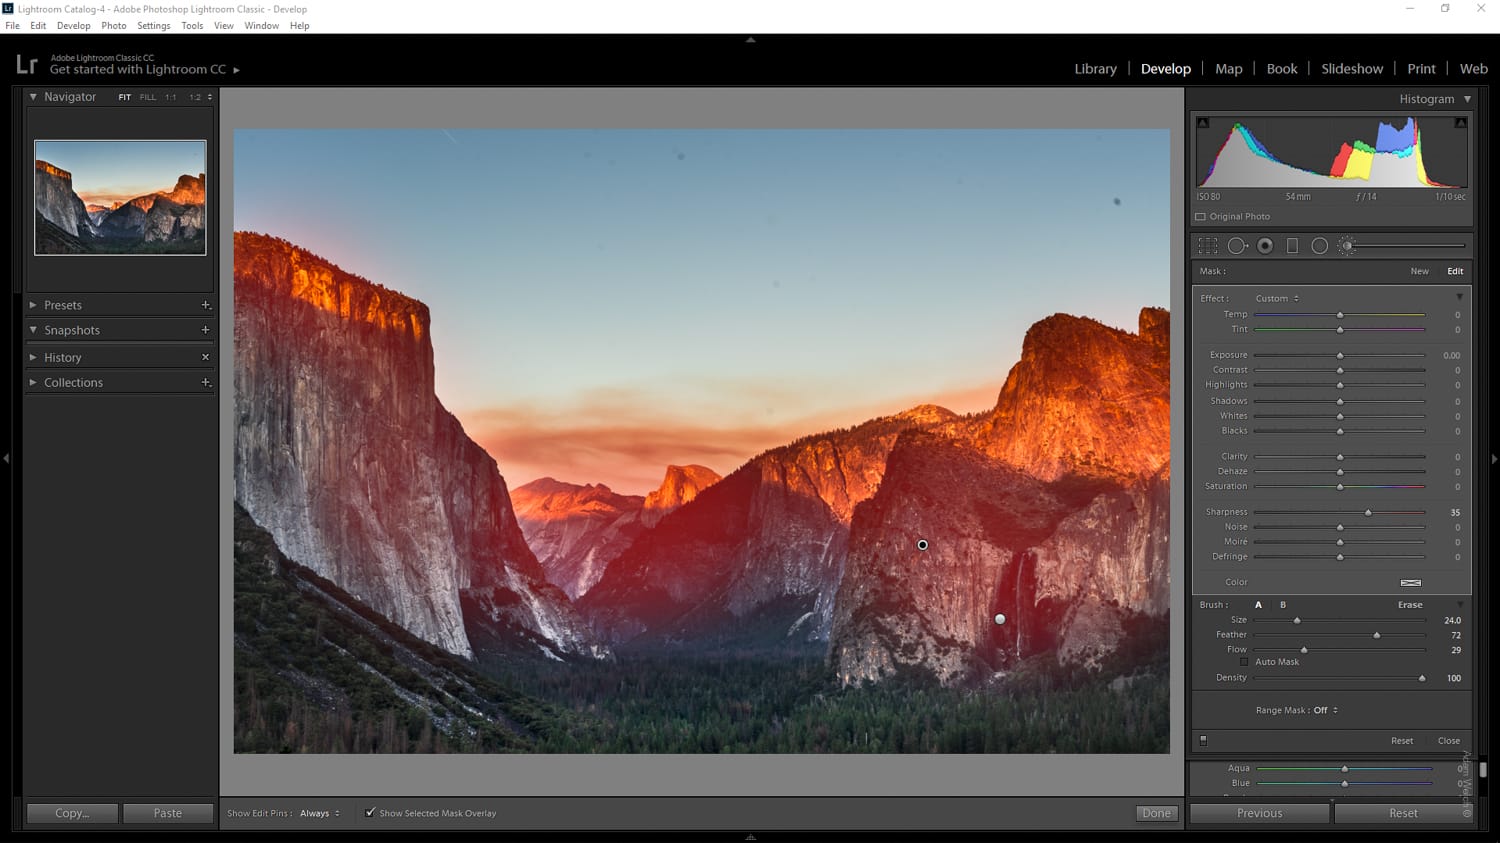
Local Adjustment Brush
Up to this point all of our local adjustments take been practical using either the gradient or radial filters. Side by side, we're going to make use of i of the not-and then hole-and-corner weapons of Lightroom to really punch in some our local adjustments. I'm talking virtually the magical local adjustment castor tool.
I'one thousand going to employ the local adjustment castor to help illuminate the details at the left and right areas of the scene.
Later on clicking on the adjustment brush icon I bump up the exposure slider by +ane.2 so I get most "painting" in the effect. Be sure to adjust the size, menstruum and feathering of your castor based on your particular needs. And recall, less is normally more when it comes to the aligning castor!
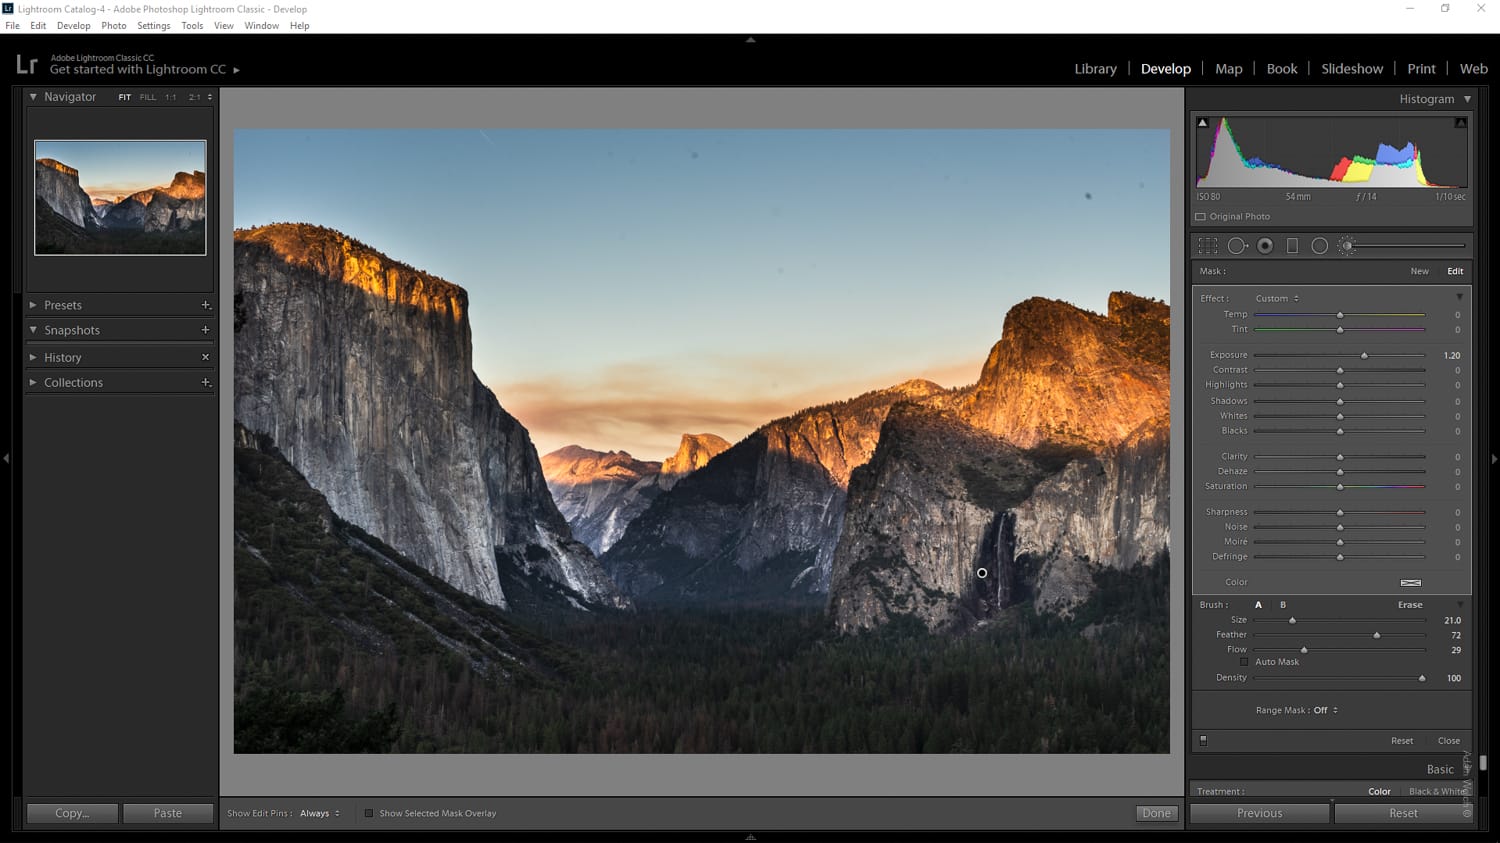
To see the areas where the castor applied it's edits more clearly, tick the "testify selected mask overlay" at the lesser of the view window.

Using the HSL Panel
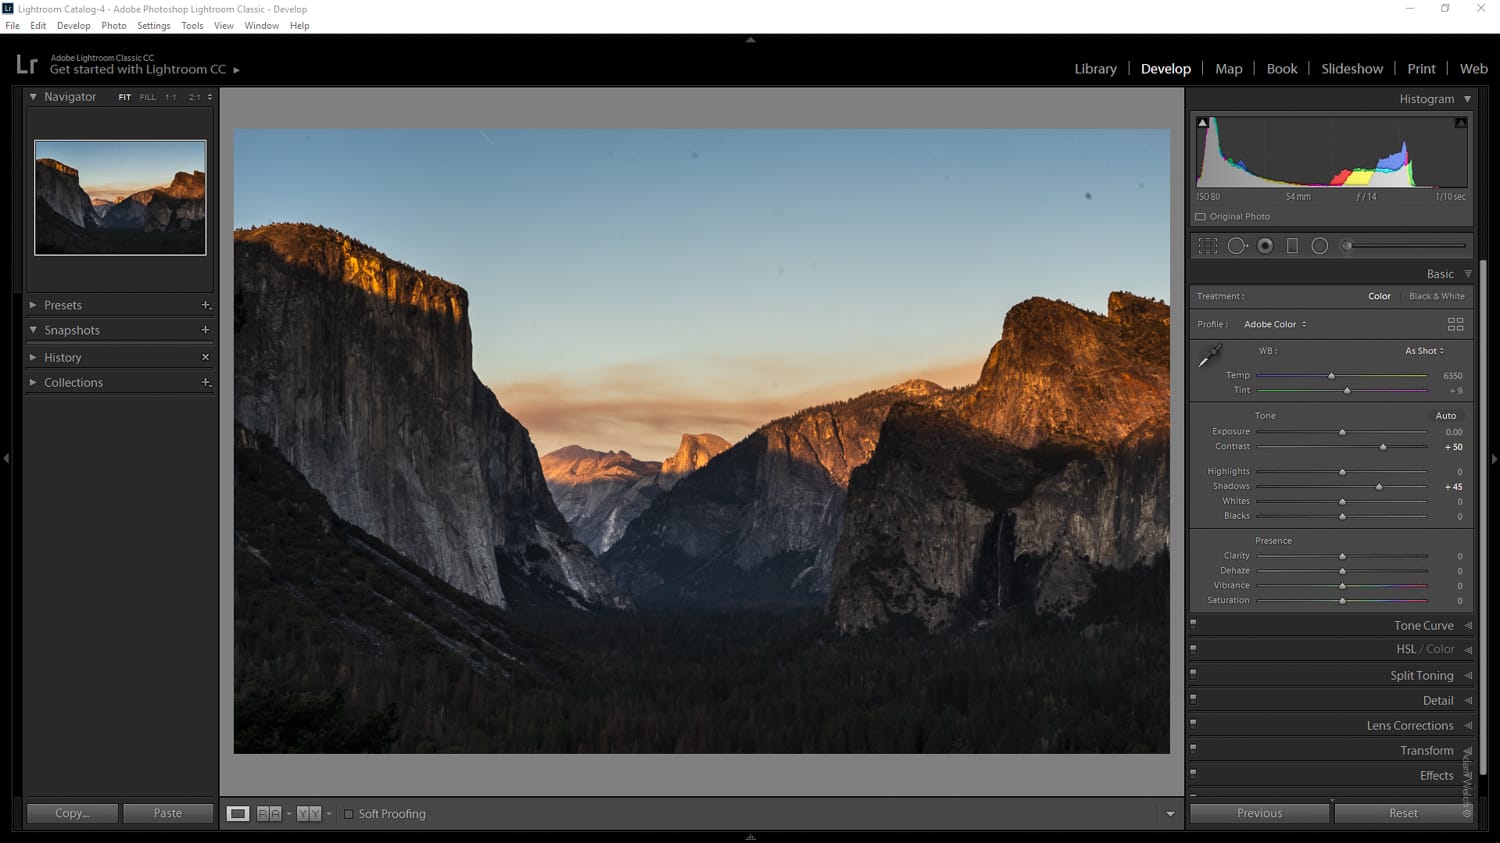
I beloved how the late afternoon sun illuminates the tops of the stone faces in this image and so I want to amplify the saturation of that nice warm glow. To practice this but not modify the rest of the colors within the prototype, I'll make use of the trusty HSL console.
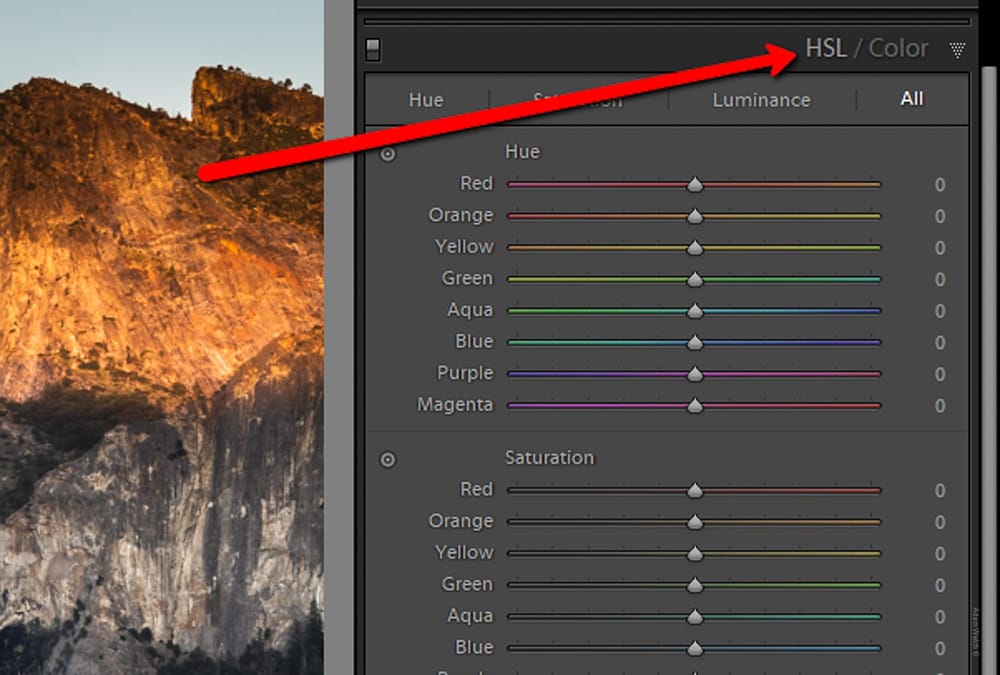
I adjust the saturations of the orangish tones within the image by +40. Adjacent, I decide to alter the hue slightly and make those oranges a footling more red in tone. To do this, I move the orange hue slider to -25. The overall all effect gives results I'yard afterward without tampering with the other colors within the photo. However, keep in mind that while the HSL panel is an crawly tool for specifically adjusting colour tones and luminance it also is a global aligning tool. Meaning, that whichever color you might be working with volition exist targeted throughout the epitome.

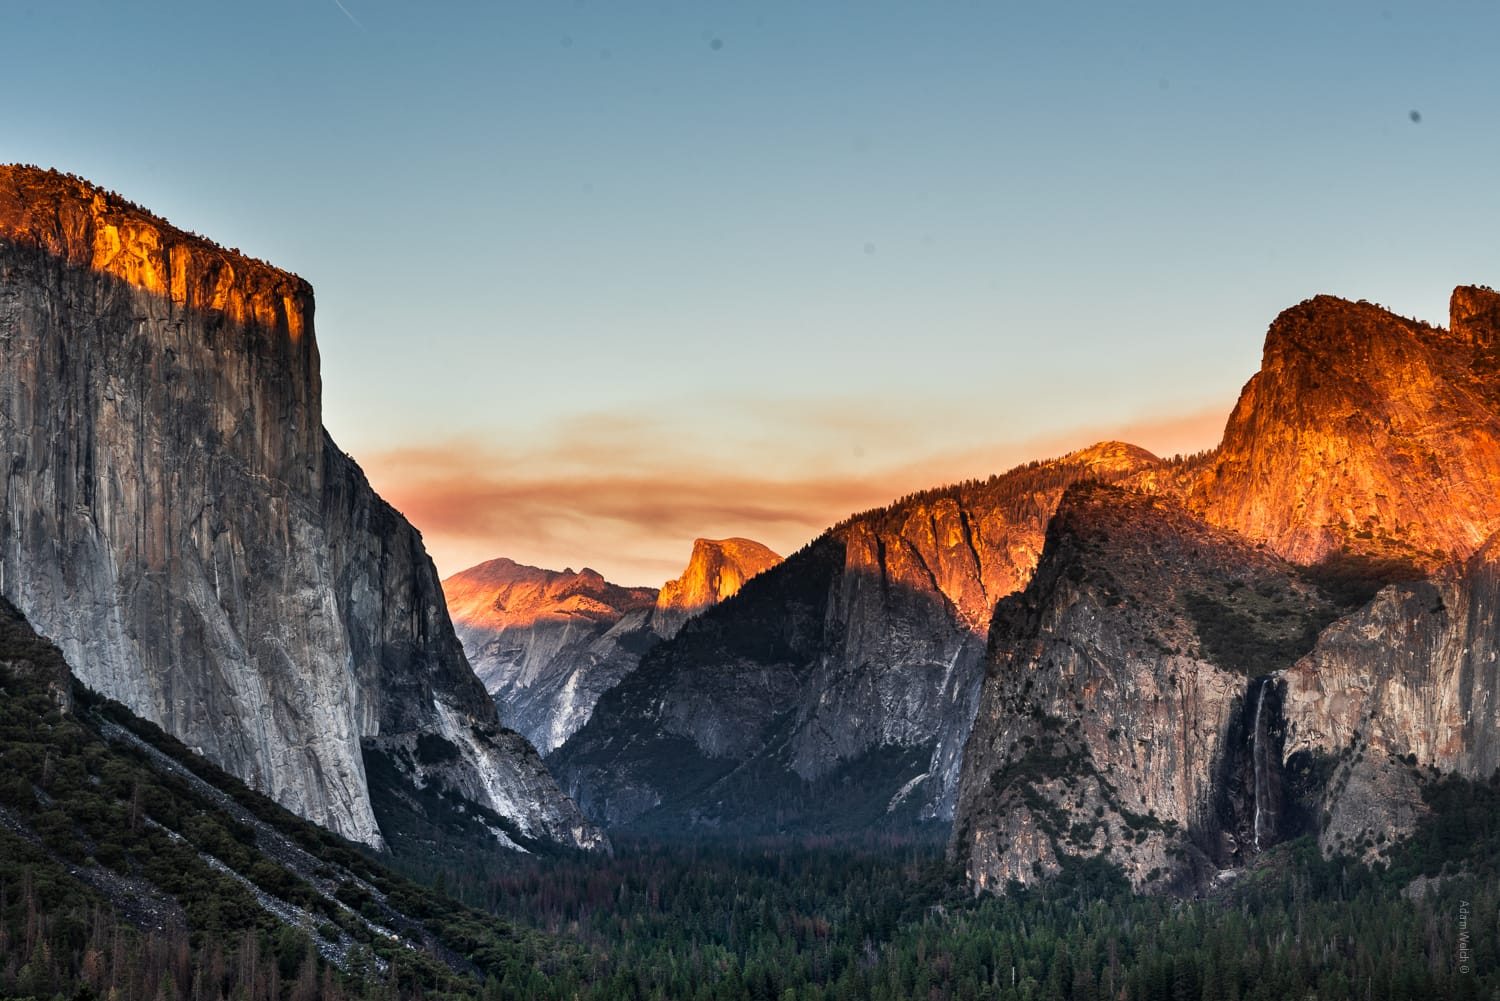
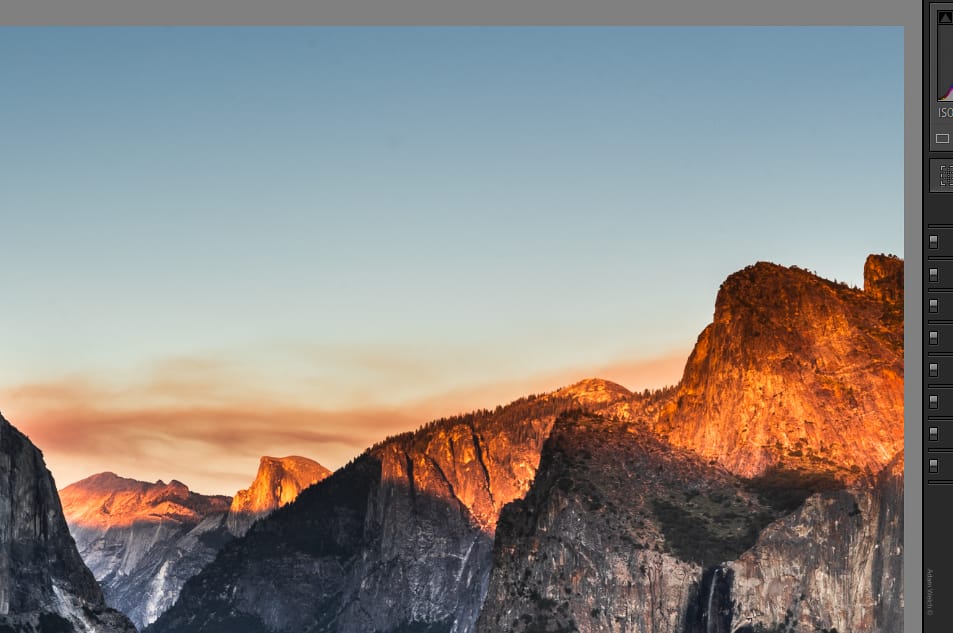
At this point, we're getting extremely close to a finished mural. Just look at the huge difference from the starting RAW file:
Subsequently looking at the paradigm I think those trees in the foreground can utilize a bit more attention and so I create another inverted RF to see if information technology will assistance out. I increase the exposure (+i.2), contrast (+xl), saturation (+50) and clarity (+35). To add even more depth I also decreased the blacks slightly by -15.

Nosotros're well-nigh done only when I was applying the RF filter to the trees I noticed the branches in the left side of the frame were extremely distracting… at least to me.

A piffling judicious cropping tin take care of this. Keeping the original proportions in tact I ingather in slightly to eliminate the distracting elements from the frame.
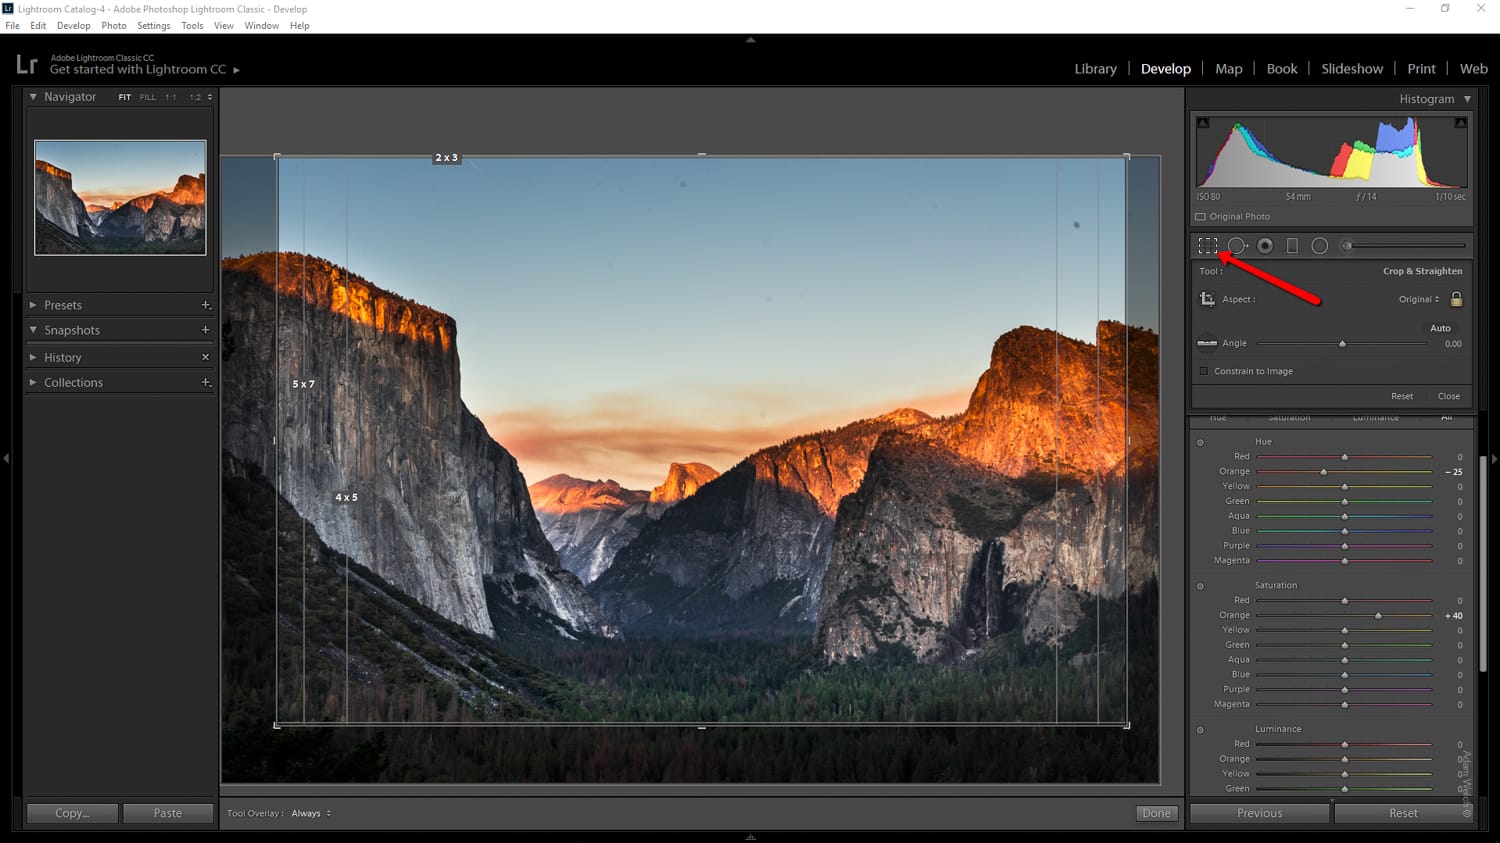
There, that's much better. The crop removed the elements that were problematic while yet preserving the overall feel of the photo.
Smarter Sharpening
This photo is already quite abrupt merely there'southward little room for increased crispness in some areas. Seeing as the entire paradigm won't benefit from added sharpening why would nosotros introduce added prototype noise by sharpening globally?
That's correct, we'll use the adjustment brush to add in the sharpening where we need information technology about and nowhere else. Just create some other local adjustment brush and heave the sharpening as yous see fit. In most instances a little sharpening tin can go a long way. For this image, I'll become with +35 sharpening.
Again, the areas in carmine indicate where the sharpening effect is applied; primarily to the main elements of the epitome and the borders where the foreground and the sky meet.
OK, is there anything else nosotros can practise to bring out the beauty in this scene?
Wait! What are those?!
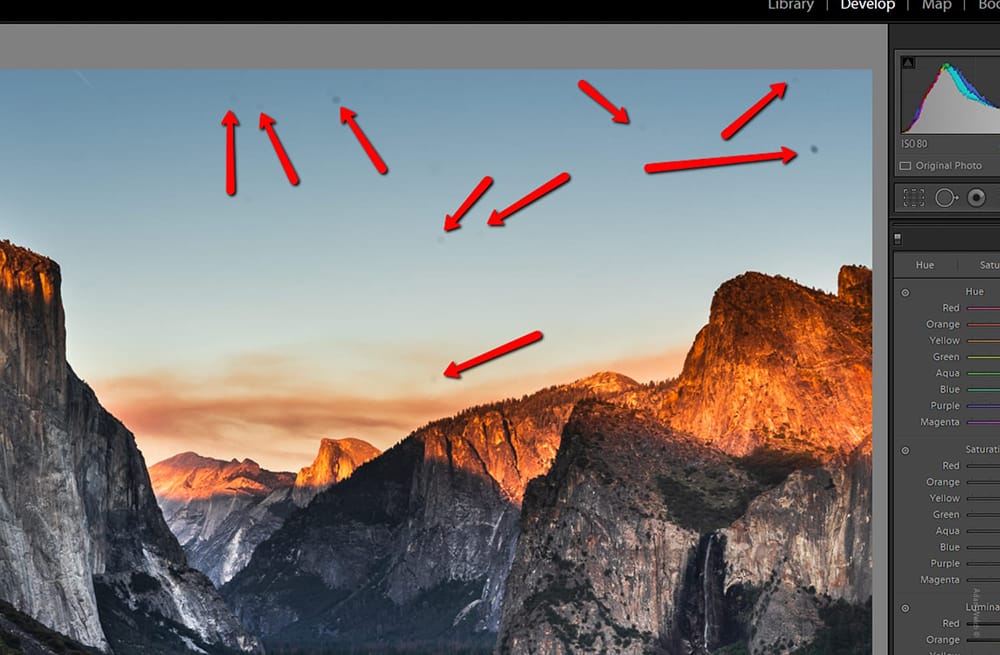
Dirt and dust are the sworn enemies of photographers everywhere and plainly this image couldn't escape their grimey grasp… Luckily, we tin easily remove this spots using the healing spot removal tool.
Spot Removal Tool
The spot removal tool in Lightroom can literally relieve the day and rid your photos of unwanted and distracting elements such every bit the dirt we see in out photo.
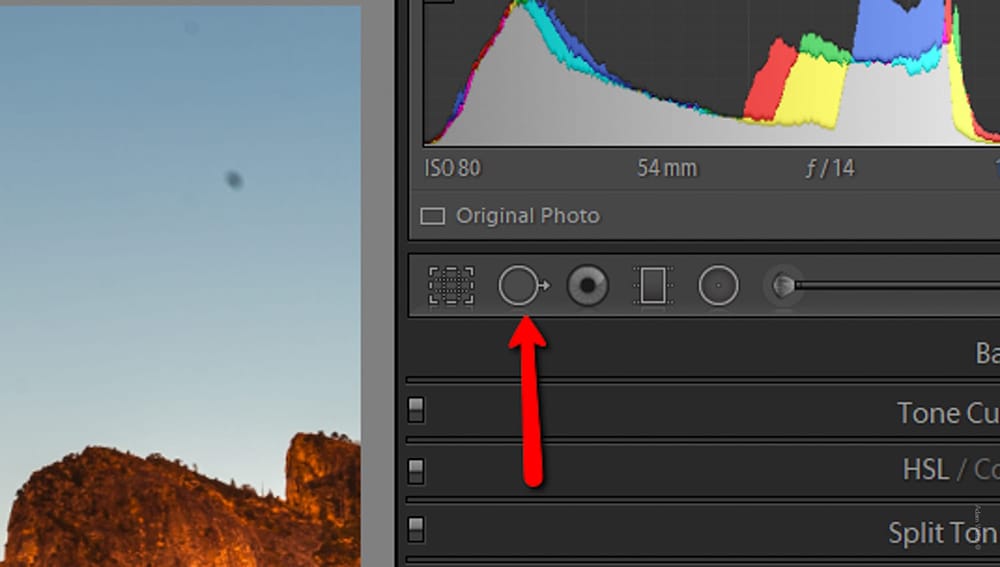
Clicking on the spot removal tool icon brings up some familiar castor settings such equally size and feathering. The big pick yous'll need to brand is whether yous want to "heal" or "clone". Cloning quite literally selects one area of the image and clones it to another. On the other hand, healing samples the pixels around a select area of the photo and blends them. It's the healing castor that we'll apply to go rid of the clay specs in our image.
I as well like to use a little trick called "visualize spots". Clicking on this option tells Lightroom to convert our image to a black and white render of which we can control the intensity.This makes the dirt particles much easier to pick out.
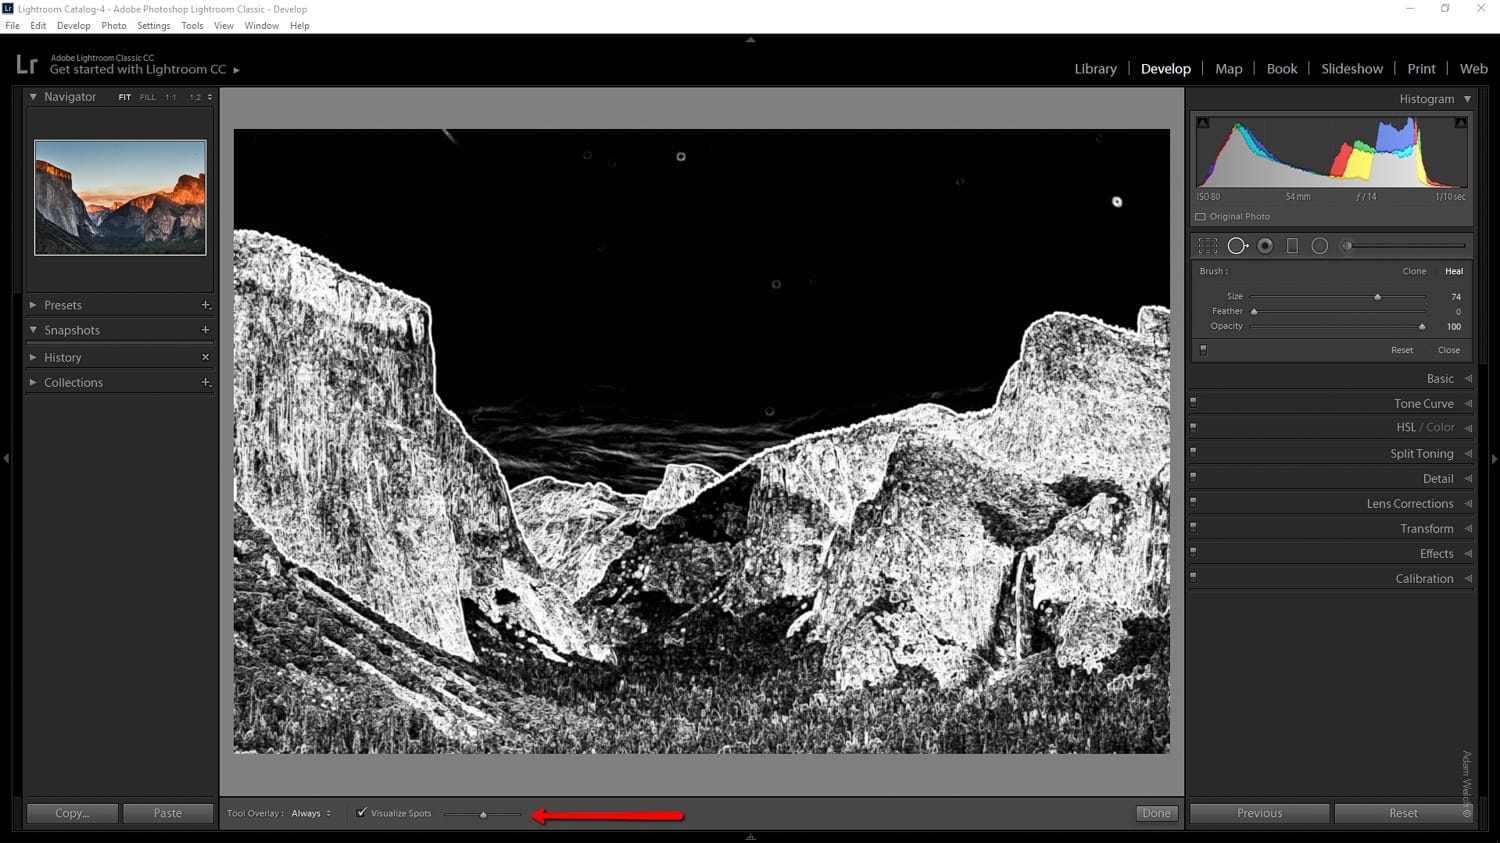
Now, that'south much amend!
It's always a good idea to leave your spot removal or retouching until the finish of your editing. If not, you run the hazard of later edits causing the healing or cloning to stand out more and wait unnatural.
Final Thoughts on Editing Landscape Photos
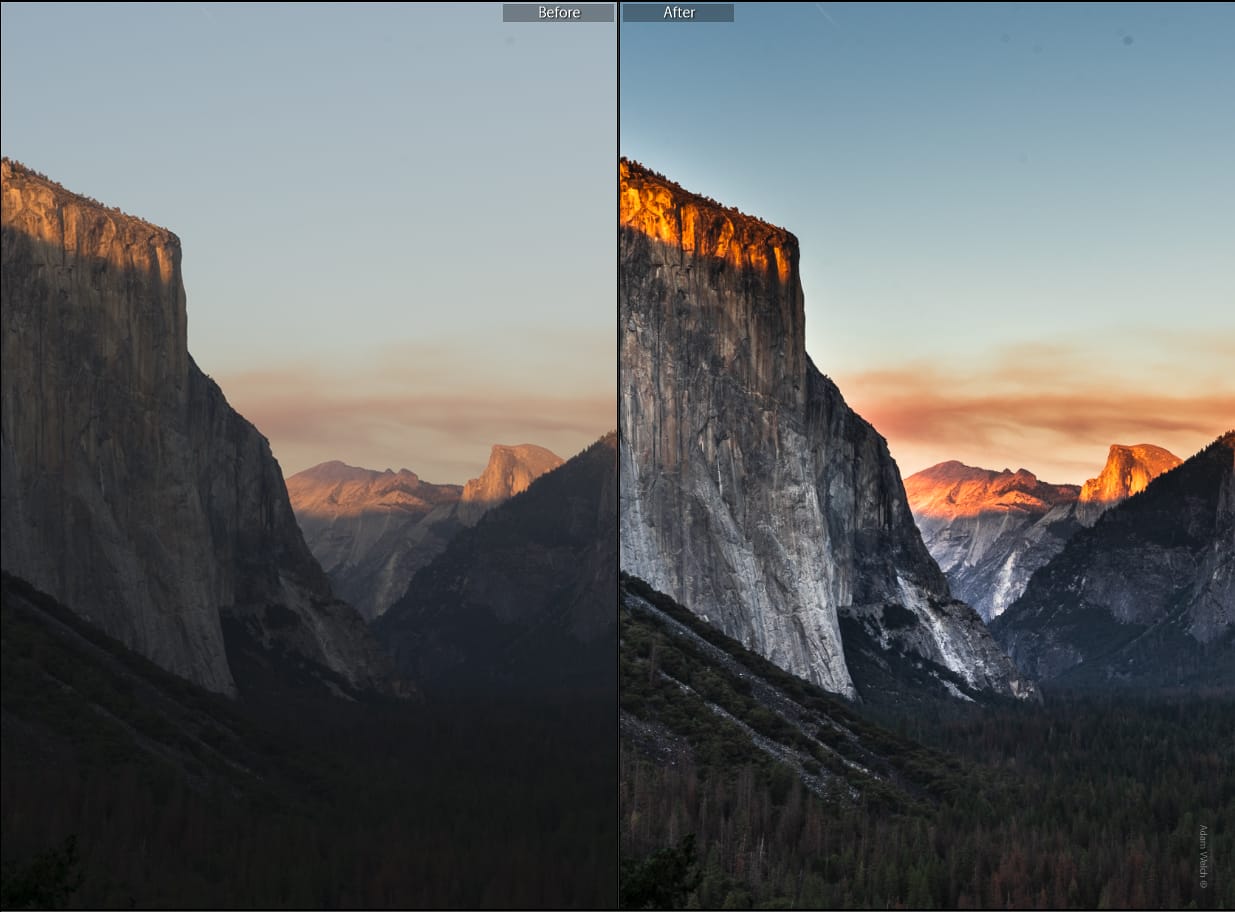
Nosotros've gone from this…
…to this…
…using a relatively few amount of edits. When it comes to processing your Mural photos in Lightroom Archetype CC knowing how and when to apply local and global edits tin can help you to edit your images apace, efficiently, and most importantly… in a way that showcases your original vision.
Call back, keep it existent. The purpose of landscape photography is to transport the viewer to a identify they might never have seen. A strong mural photo takes the physical appearance of the mural and blends it with the creative vision of the lensman. Make employ of the tools in Lightroom to polish your photographs until they smoothen and don't be agape to plow them into something truly unique.

How To Fix Grass In Lightroom Classic,
Source: https://contrastly.com/how-to-edit-a-landscape-image-like-the-pros-in-lightroom/
Posted by: hunttherlhe.blogspot.com
0 Response to "How To Fix Grass In Lightroom Classic"
Post a Comment